 Hyundai Elantra: Head Lamps. Repair procedures
Inspection
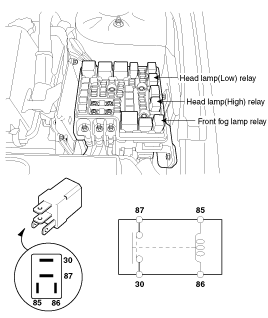
Head Lamp Relay / Front Lamp Relay
| 1. |
Pull out the relay from the engine compartment relay
box.
|
| 2. |
Check for continuity between terminals. There should
be continuity between the No.87 and No.30 terminals when power and ground
are connected to the No.86 and No.85 terminals.
|
| 3. |
There should be no continuity between the No.87 and
No.30 terminals when power is disconnected.
|
Tail Lamp
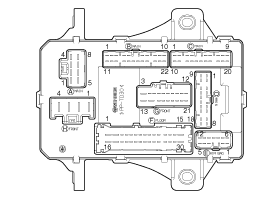
Check for continuity between the terminals.
| 1. |
There should be continuity between the No.2 terminal
in the I/P-H and the No.15(LH) or 4(RH) terminal in the I/P-G when power
and ground are connected to the No.2 terminal in the I/P-H and the No.6
terminal in the I/P-D.
|
| 2. |
There should be no continuity between the No.2 terminal
in the I/P-H and the No.15(LH) or 4(RH) terminal in the I/P-G when power
and ground are connected to the No.2 terminal in the I/P-H and the No.6
terminal in the I/P-D.
|
Adjustment
Head Lamp Aiming Instructions
The head lamps should be aimed with the proper beam-setting
equipment, and in accordance with the equipment manufacturer's instructions.
If there are any regulations pertinent to the aiming
of head lamps in the area where the vehicle is to be used, adjust so
as to meet those requirements.
|
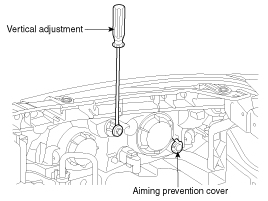
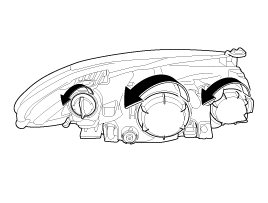
Alternately turn the adjusting gear to adjust the head lamp
aiming. If beam-setting equipment is not available, proceed as follows :
| 1. |
Inflate the tires to the specified pressure and remove
any loads from the vehicle except the driver, spare tire, and tools.
|
| 2. |
The vehicle should be placed on a flat floor.
|
| 3. |
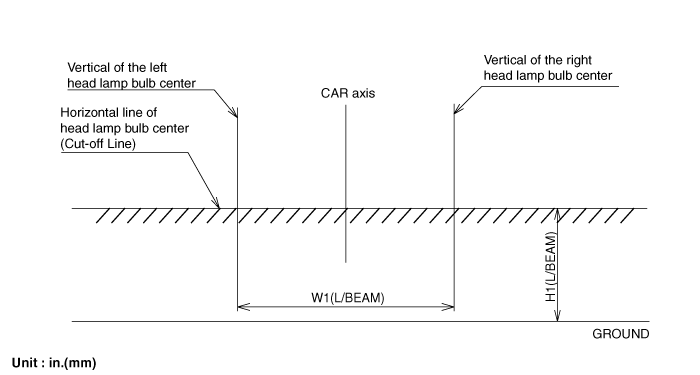
Draw vertical lines (Vertical lines passing through
respective head lamp centers) and a horizontal line (Horizontal line
passing through center of head lamps) on the screen.
|
| 4. |
With the head lamp and battery in normal condition,
aim the head lamps so the brightest portion falls on the horizontal
and vertical lines.
Make vertical adjustments to the lower beam using
the adjusting wheel.
|
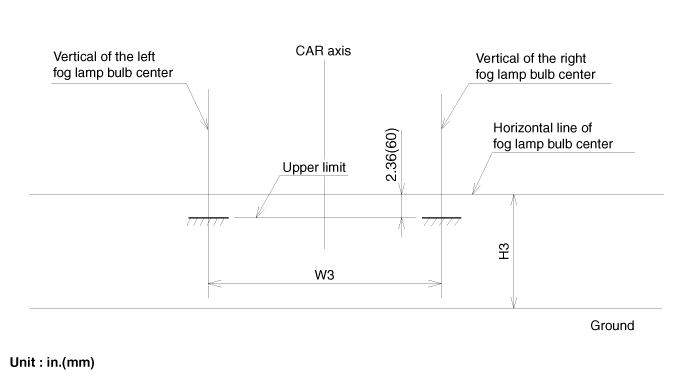
Front Fog Lamp Aiming
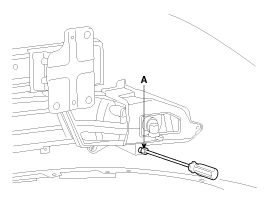
The front fog lamps should be aimed as the same manner of
the head lamps aiming.
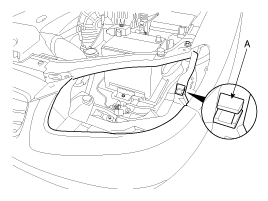
With the front fog lamps and battery normal condition, aim
the front fog lamps by turning the adjusting gear (A).
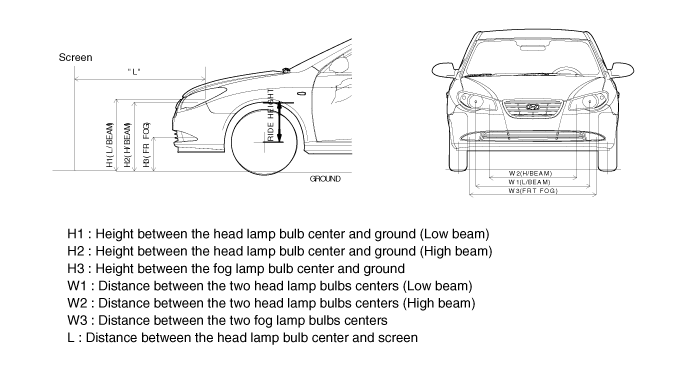
Head Lamp And Fog Lamp Aiming Point

| 1. |
Turn the low beam on without driver aboard.
In case of using a head light aim test machine, the
Hot-point should be projected within the specified point in the illustration.
In case of using a screen, the Cut-off line should
be projected in the allowable range (shaded region).
|
| 2. |
Turn the front fog lamp on with driver.
The cut-off line should be projected in the allowable
range (shaded region)
|
Removal
| 1. |
Disconnect the negative (-) battery terminal.
|
| 2. |
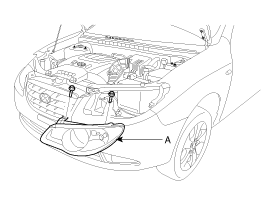
Loosen the mounting bolts (2EA) of head lamp. Remove
the head lamp assembly (A) after disconnecting the lamp connectors.
|
| 3. |
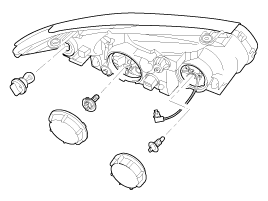
Remove the bulb caps from the head lamp assembly.
|
| 4. |
Remove the head lamp bulbs.
|
Installation
| 1. |
Install the head lamp bulbs.
|
| 2. |
Install the head lamp bulb caps.
|
| 3. |
Install the head lamp assembly after connecting the
lamp connector.
|

