 Hyundai Elantra: Timing Belt. Repair procedures
Removal
Engine removal is not required for this procedure.
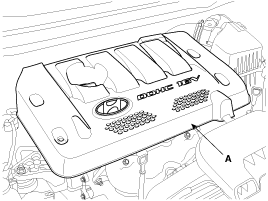
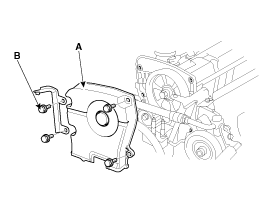
| 1. |
Remove the engine cover (A).
|
| 2. |
Remove RH front wheel.
|
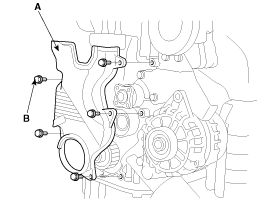
| 3. |
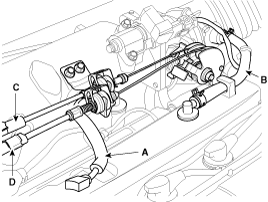
Remove 2bolts (B) and RH side cover (A).
|
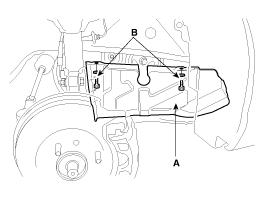
| 4. |
Remove the engine mount bracket.
|

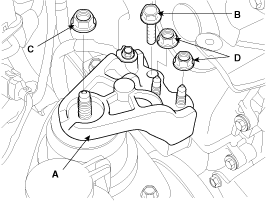
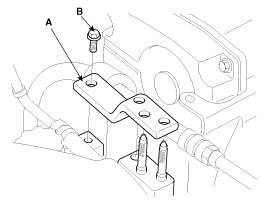
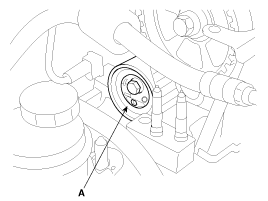
| 5. |
Temporarily loosen the water pump pulley bolts.
|
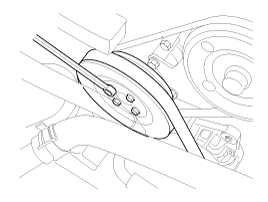
| 6. |
Remove alternator belt.
|
| 7. |
Remove air compressor belt.
|
| 8. |
Remove power steering belt.
|
| 9. |
Remove four bolts and water pump pulley.
|
| 10. |
Remove the four bolts (B) and timing belt upper cover (A).
|
| 11. |
Turn the crankshaft pulley, and align its groove with timing mark
“T”of the timing belt cover.
|

| 12. |
Remove the crankshaft pulley bolt (B) and crankshaft pulley (A).
|

| 13. |
Remove the crankshaft flange (A).
|
| 14. |
Remove the 5bolts (B) and timing belt lower cover (A).
|
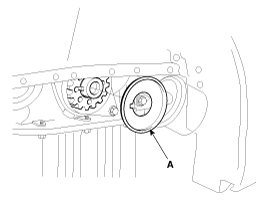
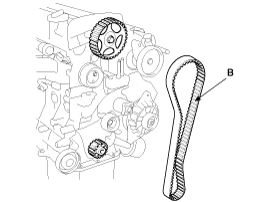
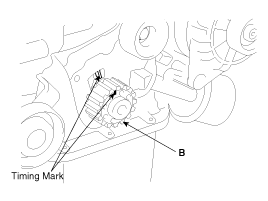
| 15. |
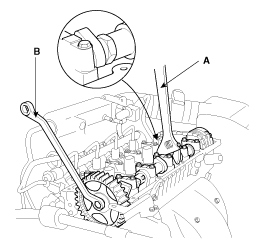
Remove the timing belt tensioner (A) and timing belt (B).
|
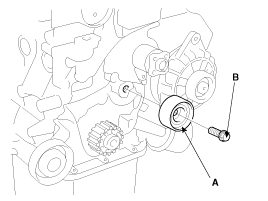
| 16. |
Remove the bolt (B) and timing belt idler (A).
|
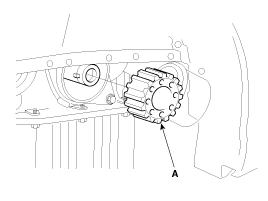
| 17. |
Remove the crankshaft sprocket (A).
|
| 18. |
Remove the cylinder head cover.
|
| 19. |
Remove camshaft sprocket.
|
Inspection
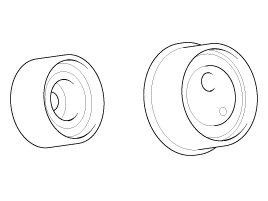
Spockets, Tensioner, Idler
| 1. |
Check the camshaft sproket, crankshaft sprocket, tensioner pulley,
and idler pulley for abnormal wear, cracks, or damage. Replace as necessary.
|
| 2. |
Inspect the tensioner pulley and the idler pulley for easy and
smooth rotation and check for play or noise.
Replace as necessary.
|
| 3. |
Replace the pulley if there is a grease leak from its bearing.
|
Timing Belt
| 1. |
Check the belt for oil or dust deposits.
Replace, if necessary.
Small deposits should be wiped away with a dry cloth or paper.
Do not clean with solvent.
|
| 2. |
When the engine is overhauled or belt tension adjusted, check
the belt carefully. If any of the following flaws are evident, replace
the belt.
|
Installation
| 1. |
Install the camshaft sprocket and tighten the bolt to the specified
torque.
|
| 2. |
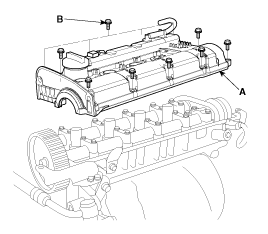
Install cylinder head cover.
|
| 3. |
Install the crankshaft sprocket (A).
|
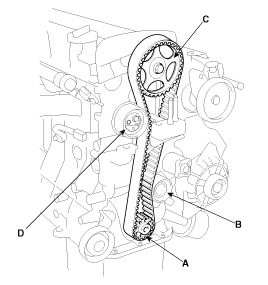
| 4. |
Align the timing marks of the camshaft sprocket (A) and crankshaft
sprocket (B) with the No. 1 piston placed at top dead center and its
compression stroke.
|

| 5. |
Install the idler pulley (A) and tighten the bolt (B) to the specified
torque.
|
| 6. |
Install the timing belt tensioner loosely enough for the adjuster
to rotate. Make sure that the stopper of base is leaning against the
lowering sealing cap on the cylinder head.
|
| 7. |
Belt so as not give slack at each center of shaft. Do as following
procedures when installing timing belt.
Crankshaft sprocket (A) → Idler pulley (B) → Camshaft sprocket
(C) → timing belt tensioner (D).
(The tensioner can be installed after the timing belt.)
|
| 8. |
Check the alignment of the timing marks on each sprocket.
|
| 9. |
Remove the pin fixing the tensioner arm.
|
| 10. |
Using a hex wrench, turn the adjuster counterclockwise to make
the indicator of the arm (A) located at the center of the base notch.
|
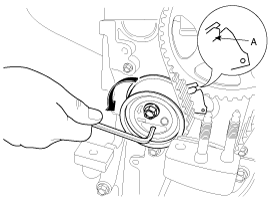
| 11. |
Tightening tensioner bolt with fixing the indicator not to move.
|
| 12. |
Turn the crankshaft two revolutions in the operating direction
(clockwise) and check that the indicator is in the center of base.
|
| 13. |
If the indicator is not located at the center of base, slacken
the bolt and repeat the abore procedure.
|
| 14. |
Install the timing belt lower cover (A) with 5 bolts (B).
|
| 15. |
Install the flange and crankshaft pulley (A).
Make sure that crankshaft sprocket pin fits the small hole in
the pulley.
|
| 16. |
Install the timing belt upper cover (A) with 4bolts (B).
|
| 17. |
Install the coolant pump pulley with 4bolts.
|
| 18. |
Install power steering belt.
|
| 19. |
Install air compressor bolt.
|
| 20. |
Install alternator belt.
|
| 21. |
Install the engine mount bracket
|
| 22. |
Install RH side cover (A) with 2bolts (B).
|
| 23. |
Install RH front wheel.
|
| 24. |
Install engine cover (A) with the four bolts.
|


