 Hyundai Elantra: Repair procedures
Engine Coolant Refilling and Bleeding
When pouring engine coolant, be sure to shut the relay box lid
and not to let coolant spill on the electrical parts or the paint. If
any coolant spills, rinse it off immediately.
|
| 1. |
Slide the heater temperature control lever to maximum heat. Make
sure the engine and radiator are cool to the touch.
|
| 2. |
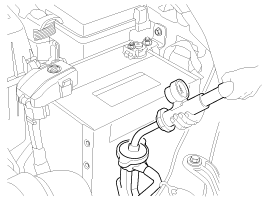
Remove radiator cap (A).
|

| 3. |
Loosen the drain plug, and drain the coolant.
|
| 4. |
Tighten the radiator drain plug securely.
|
| 5. |
Remove, drain and reinstall the reservoir. Fill the tank halfway
to the "F" mark with water, then up to the "F" mark with antifreeze.
|
| 6. |
Mix the recommended antifreeze with water at the ratio of four
to six in a clean container.
|
| 7. |
Pour coolant into the radiator up to base of the filler neck,
and install the radiator cap loosely.
|
| 8. |
Start the engine and let it run until it warms up (the radiator
fan comes on at least twice).
|
| 9. |
Turn off the engine. Check the level in the radiator, add coolant
if needed.
|
| 10. |
Put the radiator cap on tightly, then run the engine again and
check for leaks.
|
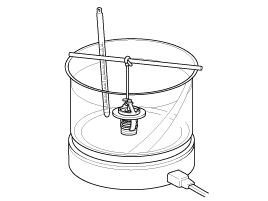
Cap Testing
| 1. |
Remove the radiator cap, wet its seal with engine coolant, then
install it no pressure tester.
|
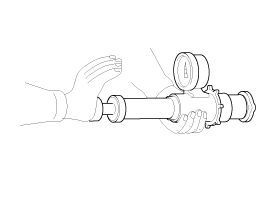
| 2. |
Apply a pressure of 93.16 ~ 122.58kPa (0.95 ~ 1.25kgf/cm², 13.51
~ 17.78psi).
|
| 3. |
Check for a drop in pressure.
|
| 4. |
If the pressure drops, replace the cap.
|
Testing
| 1. |
Wait until engine is cool, then carefully remove the radiator
cap and fill the radiator with engine coolant, then install it on the
pressure tester.
|
| 2. |
Apply a pressure tester to the radiator and apply a pressure of
93.16 ~ 122.58kPa (0.95 ~ 1.25kgf/cm² 13.51 ~ 17.78psi).
|
| 3. |
Inspect for engine coolant leaks and a drop in pressure.
|
| 4. |
Remove the tester and reinstall the radiator cap.
|
Removal
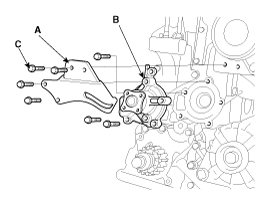
Water Pump
| 1. |
Drain the engine coolant.
|
| 2. |
Remove drive belts.
|
| 3. |
Remove the timing belt.
|
| 4. |
Remove the timing belt idler.
|
| 5. |
Remove the water pump.
|
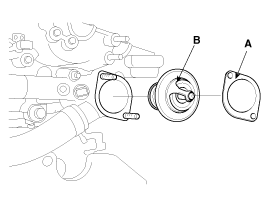
Thermostat
Removal of the thermostat would have an adverse effect, causing
a lowering of cooling efficiency. Do not remove the thermostat, even
if the engine tends to overheat.
|
| 1. |
Drain engine coolant so its level is below thermostat.
|
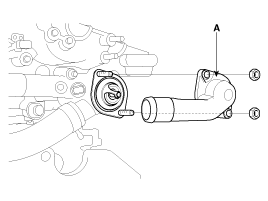
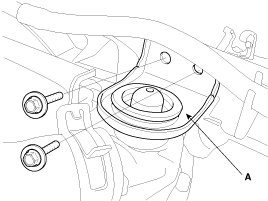
| 2. |
Remove water inlet (A), gasket and thermostat.
|
Radiator
| 1. |
Drain the engine coolant.
|
| 2. |
Remove the upper and lower radiator hoses (A, B), and ATF cooler
hoses.
|
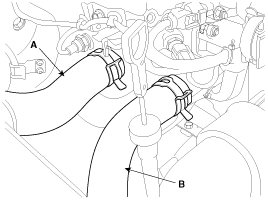
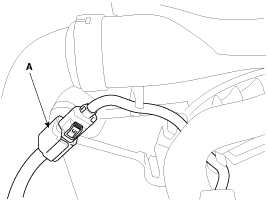
| 3. |
Disconnect the fan motor connector(A).
|
| 4. |
Separate the air conditioner condenser with radiator.
|
| 5. |
Remove the radiator upper bracket (A), then pull up the radiator.
|
Inspection
Water Pump
| 1. |
Check each part for cracks, damage or wear, and replace the coolant
pump assembly if necessary.
|
| 2. |
Check the bearing for damage, abnormal noise and sluggish rotation,
and replace the coolant pump assembly if necessary.
|
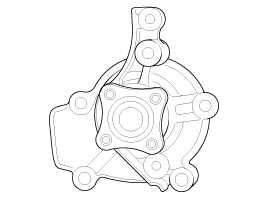
| 3. |
Check for coolant leakage. If coolant leaks from hole, the seal
is defective. Replace the coolant pump assembly
|
Thermostat
| 1. |
Immerse the thermostat in water and gradually heat the water.
|
| 2. |
Check the valve opening temperature.
If the valve opening temperature is not as specified, replace
the thermostat.
|
| 3. |
Check the valve lift.
If the valve lift is not as specified, replace the thermostat.
|
Installation
Water Pump
| 1. |
Install the water pump.
|
| 2. |
Install the timing belt idler.
|
| 3. |
Install the timing belt.
|
| 4. |
Install drive belts.
|
| 5. |
Fill with engine coolant.
|
| 6. |
Start engine and check for leaks.
|
| 7. |
Recheck engine coolant level.
|
Thermostat
| 1. |
Place thermostat in thermostat housing.
|
| 2. |
Install water inlet (A).
|
| 3. |
Fill with engine coolant.
|
| 4. |
Start engine and check for leaks.
|
Radiator
| 1. |
Install the cooling fan to the radiator.
|
| 2. |
Install the radiator at the air conditioner condenser.
Installation is in the reverse order of removal.
|
| 3. |
Connect the fan motor connector(A).
|
| 4. |
Install the upper and lower radiator hoses(A, B), and ATF cooler
hoses.
|
| 5. |
Fill with engine coolant.
|
| 6. |
Start engine and check for leaks.
|


