 Hyundai Elantra: Rear Lower Arm. Repair procedures
Removal
| 1. |
Remove the rear wheel & tire.
|
| 2. |
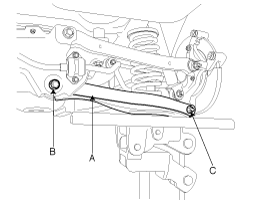
Support the lower portion of the rear lower arm (A) with a jack.
|
| 3. |
Temporarily loosen the bolt (B) holding the cross member to the
rear lower arm. Do not remove it.
|
| 4. |
Remove the bolt & nut (C) holding the rear lower arm to the carrier
assembly.
|
| 5. |
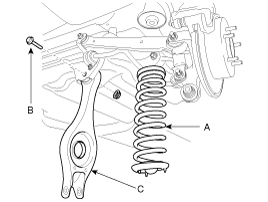
Lower the jack and then remove the coil spring (A) and the spring
pad.
|
| 6. |
Remove the rear lower arm (C) from the cross member by removing
the bolt (B) completely.
|
Inspection
| 1. |
Check the bushing for wear and deterioration.
|
| 2. |
Check the rear lower arm for deformation.
|
| 3. |
Check the coil spring and spring pad for deterioration and deformation.
|
| 4. |
Check for all bolts and nut.
|
Installation
| 1. |
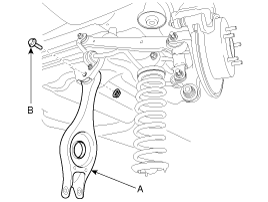
Connect the rear lower arm (A) with the cross member and then
temporarily tighten the bolt (B).
|
| 2. |
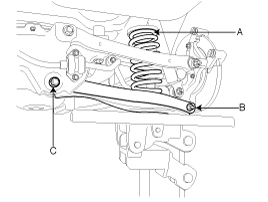
Install the coil spring (A) and support the lower portion of the
rear lower arm with a jack.
|
| 3. |
Adjust height of the jack to place the bolt (B) holding rear lower
arm and carrier assembly through the mating holes.
|
| 4. |
Tighten the bolt and nut (B, C) to the specified torque.
|
| 5. |
Install the rear wheel & tire.
|
| 6. |
Check the alignment. (Refer to 'Tires/Wheels - alingment')
|


