 Hyundai Elantra: Console. Repair procedures
Replacement
Floor Console Replacement
| [M/T] |
|
| 1. |
Using a screwdriver or remover, remove the crash pad center garnish
(A).
|

| 2. |
Using a screwdriver or remover, remove the gear boot (A).
|
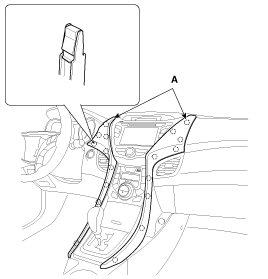
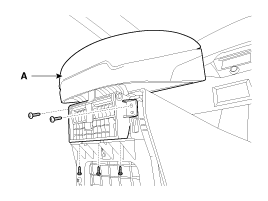
| 3. |
After loosening the mounting screws, then remove the console upper
cover (A).
|
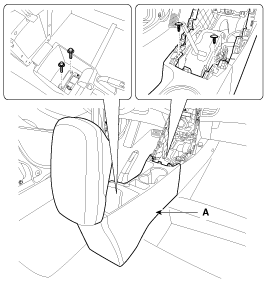
| 4. |
Disconnect the connectors (A).
|
| 5. |
Using a screwdriver or remover, remove the parking brake cover
(A).
|
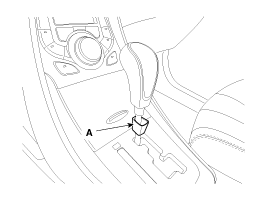
| 6. |
Remove the console tray mat (A).
|

| 7. |
After loosening the mounting screws and bolts, then remove the
floor console assembly (A).
|
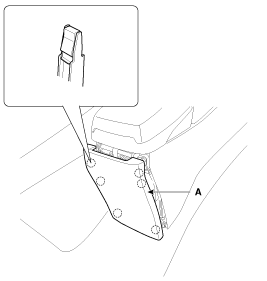
| 8. |
After loosening the mounting screw, nut, clip, then remove the
console side cover (A).
|

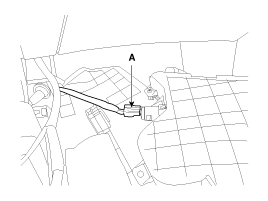
| 9. |
Disconnect the connector (A).
|
| 10. |
Installation is the reverse of removal.
|
| [A/T] |
|
| 1. |
Using a screwdriver or remover, remove the crash pad center garnish
(A).
|
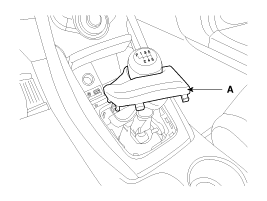
| 2. |
Using a screwdriver or remover, remove the gear knob cover (A).
|
| 3. |
Remove the lock pin (B).
|
| 4. |
Remove the gear knob (A).
|
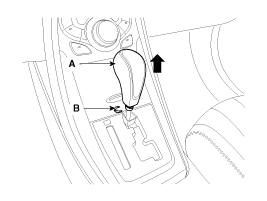
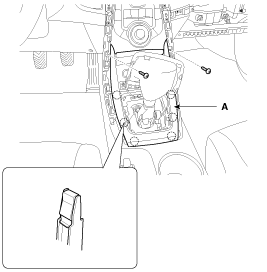
| 5. |
After loosening the mounting screws, remove the console upper
cover (A).
|
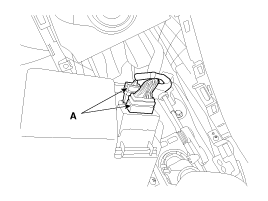
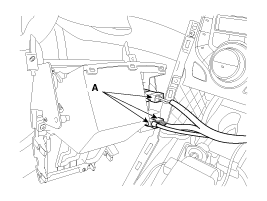
| 6. |
Disconnect the connectors (A).
|
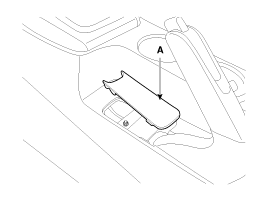
| 7. |
Using a screwdriver or remover, remove the parking brake cover
(A).
|
| 8. |
Remove the console tray mat (A).
|

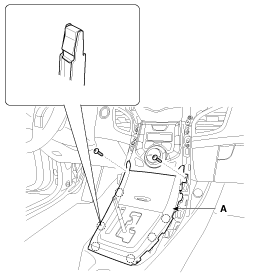
| 9. |
After loosening the mounting screws and bolts, then remove the
floor console assembly (A).
|

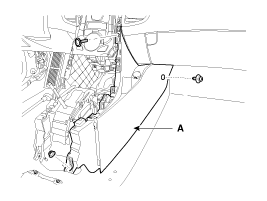
| 10. |
After loosening the mounting screw, nut, clip, then remove the
console side cover (A).
|
| 11. |
Disconnect the connector (A).
|
| 12. |
Installation is the reverse of removal.
|
Armrest Replacement
|
| 1. |
Using a screwdriver or remover, remove the rear console cover
(A).
|
| 2. |
After loosening the mounting screws, then remove the armrest assembly
(A).
|
| 3. |
Installation is the reverse of removal.
|


