 Hyundai Elantra: Speakers. Repair procedures
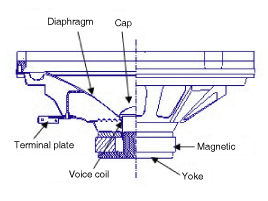
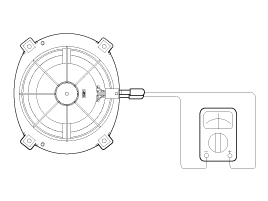
Inspection
| 1. |
Troubleshooting for Speaker
|
Removal
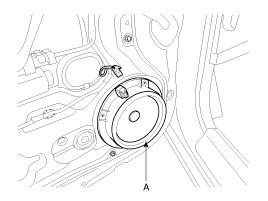
Front Speaker
| 1. |
Remove the front door trim.
(Refer to the Body group - Front door).
|
| 2. |
Remove the front speaker (A) after removing 4 rivets.
|
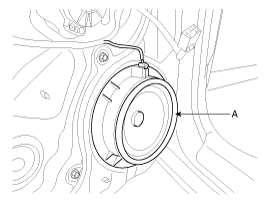
Rear Speaker
| 1. |
Remove the rear door trim.
(Refer to the Body group - Rear door).
|
| 2. |
Remove the rear speaker (A) after removing 4 rivets.
|
External Amplifier
| 1. |
Remove the right side trunk trim and disconnecting
the connector
(Refer to the Body group - Trunk trim).
|
| 2. |
Remove the external amplifier (A) after loosening
the 3 bolts.
|

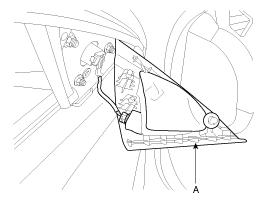
Tweeter Speaker
| 1. |
Remove the front door delta cover (A).
(Refer to the Body group - Front door).
|
| 2. |
Remove the tweeter speaker (A) after disconnecting
the connector.
|
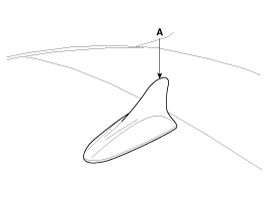
SDARS Roof Antenna
| 1. |
Remove the rear headlining.
(Refer to Body group - Roof trim)
|
| 2. |
Disconnect the antenna connector(A) to the feeder
cable connectors.
|
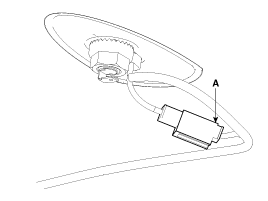
| 3. |
Disconnect the 1p power connector from the roof antenna.
|
| 4. |
Remove the SDARS roof antenna(A) from the roof pannel
hole after loosening a nut.
|
Installation
Front Speaker
| 1. |
Install the front speaker.
|
| 2. |
Install the front door trim.
|
Rear Speaker
| 1. |
Install the rear speaker.
|
| 2. |
Install the rear door trim.
|
Tweeter Speaker
| 1. |
Install the tweeter speaker after connecting the
tweeter speaker connector.
|
| 2. |
Install the front door delta cover.
|
External Amplifier
| 1. |
Install the external amplifier and connect the external
amplifier connector.
|
| 2. |
Install the right side trunk trim.
|
SDARS Roof Antenna
| 1. |
Reassemble the roof antenna and connect the connector
and antenna jack.
|
| 2. |
Reassemble the rear headlining.
|


