 Hyundai Elantra: Removal and Installation
| 1. |
Disconnect the battery terminals. (Refer to Engine and transaxle
assembly in this group)
|
| 2. |
Remove the air cleaner assembly. (Refer to Engine and transaxle
assembly in this group)
|
| 3. |
Remove the battery and battery tray. (Refer to Engine and transaxle
assembly in this group)
|
| 4. |
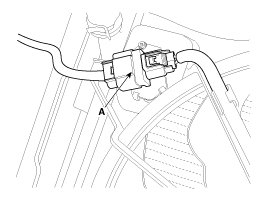
Disconnect the fan motor connector (A)
|
| 5. |
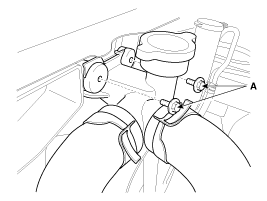
Loosen the filler neck assembly mounting bolts (A).
|
| 6. |
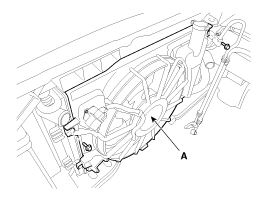
Remove the cooling fan assembly (A).
|
| 7. |
Remove the under cover. (Refer to Engine and transaxle assembly
in this group)
|
| 8. |
Loosen the drain plug, and drain the engine coolant. Remove the
radiator cap to help drain the coolant faster.
|
| 9. |
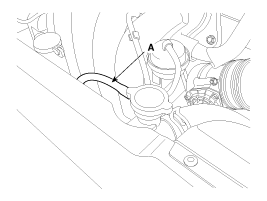
Disconnect the over flow hose (A) from the filler neck.
|
| 10. |
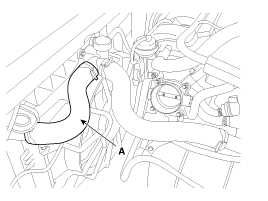
Disconnect the radiator upper hose (A).
|
| 11. |
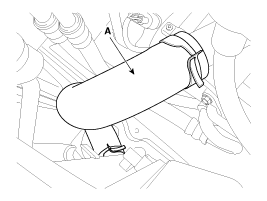
Disconnect the radiator lower hose (A).
|
| 12. |
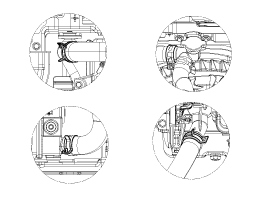
Disconnect the ATF cooler hoses (A/T only). (Refer to AT group
- "Automatic transaxle")
|
| 13. |
Remove the head lamp. (Refer to BE group – “Head lamps”)
|
| 14. |
Remove the front bumper. (Refer to BD group – “Front bumper”)
|
| 15. |
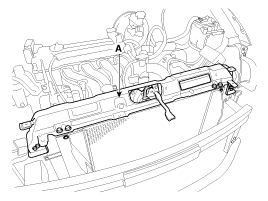
Remove the radiator upper bracket (A).
|
| 16. |
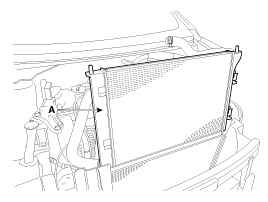
Separate the condenser from the radiator and then remove the radiator
assembly (A).
|
| 17. |
Installation is the reverse order of removal.
|
| 18. |
Fill the radiator with coolant and check for leaks.
|

