 Hyundai Elantra: Removal
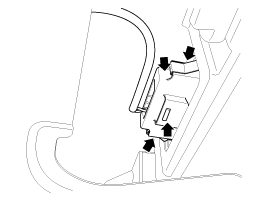
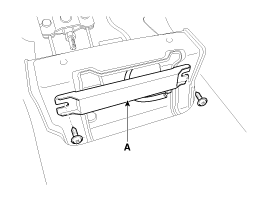
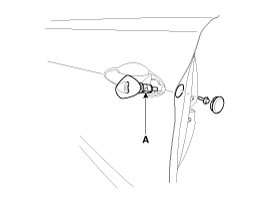
Smart key unit
| 1. |
Disconnect the negative(-) battery terminal.
|
| 2. |
Remove the glove box housing.
(Refer to the BD group - "Crash pad")
|
| 3. |
Remove the smart key unit(A) with loosening bolt and nut, then
disconnect the connector.
|
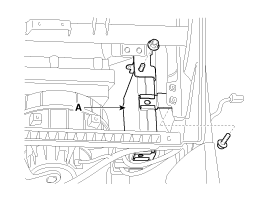
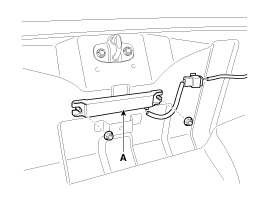
Interior #1 antenna
Take care not to scratch the crash pad and related parts.
|
| 1. |
Disconnect the negative(-) battery terminal.
|
| 2. |
Remove the console.
(Refer to the BD group - "Console")
|
| 3. |
Disconnect the connector ,then remove the interior #1 antenna(A)
with loosening 2 screws.
|
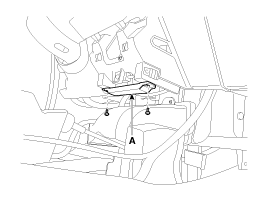
Interior #2 antenna
Take care not to scratch the crash pad and related parts.
|
| 1. |
Disconnect the negative(-) battery terminal.
|
| 2. |
Remove the console.
(Refer to the BD group - "Console")
|
| 3. |
Disconnect the connector, then remove the interior #2 antenna(A)
with loosening 2 screws.
|
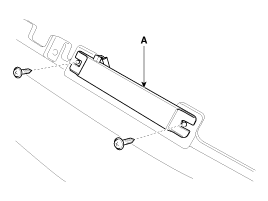
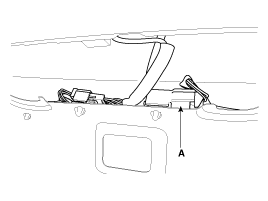
Trunk antenna
| 1. |
Disconnect the negative(-) battery terminal.
|
| 2. |
Remove the trunk transverse trim.
(Refer to the BD group - "Interior trim")
|
| 3. |
Disconnect the connector ,then remove the trunk antenna(A) with
loosening 2 nuts.
|
Exterior Bumper Antenna
| 1. |
Disconnect the negative(-) battery terminal.
|
| 2. |
Remove the rear bumper.
(Refer to the BD group - "Rear bumper")
|
| 3. |
Remove the rear bumper rail.
(Refer to the BD group - "Rear bumper")
|
| 4. |
Disconnect the connector ,then remove the rear bumper antenna(A)
with loosening 2 screws.
|
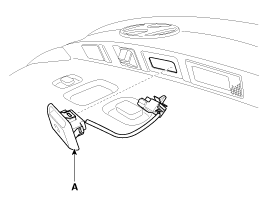
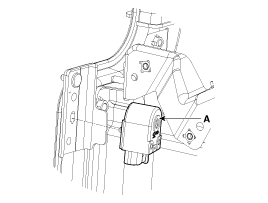
Buzzer
| 1. |
Disconnect the negative(-) battery terminal.
|
| 2. |
Remove the left head lamp.
|
| 3. |
Remove the buzzer(A) after disconnecting the connector.
|
Door outside handle
| 1. |
Disconnect the negative(-) battery terminal.
|
| 2. |
Remove the front door module.
(Refer to the BD group - "Front door")
|
| 3. |
After loosening the mounting bolt, then remove the outside handle
cover (A).
|
Trunk lid open switch
| 1. |
Disconnect the negative(-) battery terminal.
|
| 2. |
Remove the trunk door trim.
(Refer to the BD group - "Trunk")
|
| 3. |
Disconnect the trunk lid open switch connector (A).
|
| 4. |
Remove the trunk outside handle(A) after pressing the clips.
|