 Hyundai Elantra: Rear Door. Repair procedures
Replacement
Door Trim Replacement
|
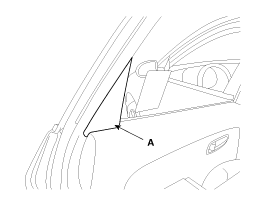
| 1. |
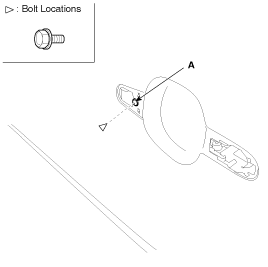
Remove the delta inner cover (A).
|
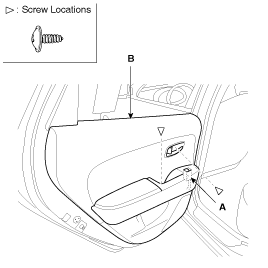
| 2. |
Loosen the door trim (B) mounting screws. release the clips that
hold the door trim, then remove the door trim by pulling it upward.
disconnect the power window switch connector (A).
|
| 3. |
Installation is the reverse of removal.
|
Glass Replacement
|
| 1. |
Remove the door trim.
|
| 2. |
Remove the door belt weatherstrip.
|
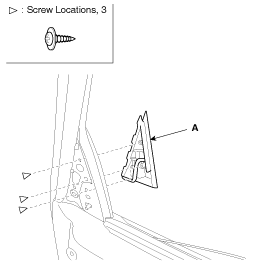
| 3. |
Loosen the screws, then remove the delta molding (A).
|
| 4. |
Release the rear channel mounting bolt and nut.
|
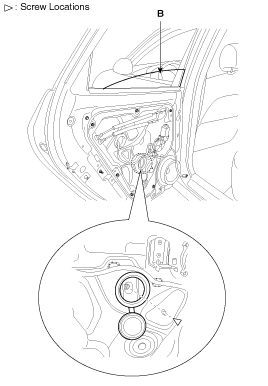
| 5. |
Carefully move the glass (B) until you can see the screw, then
loosen them. Separate the glass from the glass run and carefully pull
the glass out through the window slot.
|
| 6. |
Installation is the reverse of removal.
|
Power Window Motor Replacement
| 1. |
Remove the door trim.
|
| 2. |
After disconnecting the connector (A), remove the power window
motor (B).
|
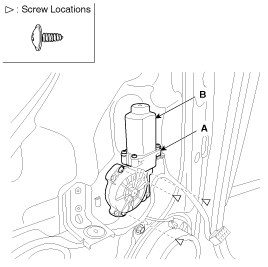
| 3. |
Installation is the reverse of removal.
|
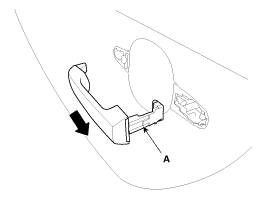
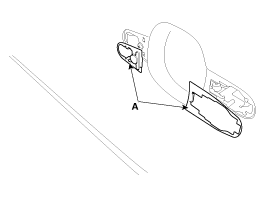
Out Side Handle Replacement
| 1. |
After loosening the mounting bolt, then remove the handle cover
(A).
|
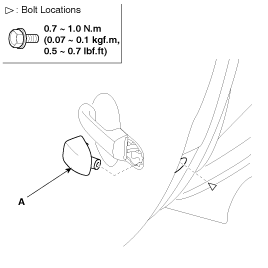
| 2. |
Remove the outside handle (A) by sliding it rearward.
|
| 3. |
Remove the outside handle pad (A).
|
| 4. |
Installation is the reverse of removal.
|
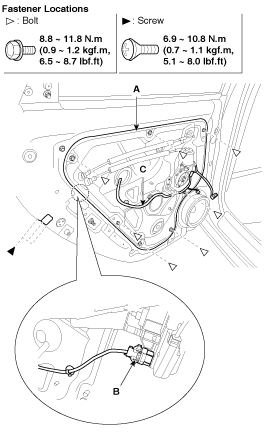
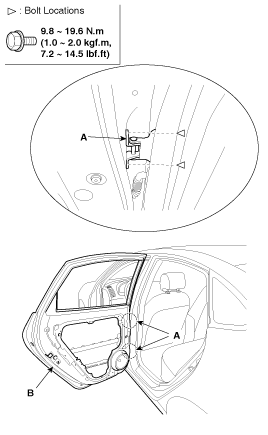
Module Assembly Replacement
| 1. |
Remove the following parts.
|
| 2. |
Loosen the mounting bolt (A).
|
| 3. |
After loosening the door module mounting bolts, remove the door
module (A).
|
| 4. |
Disconnect the connector (B).
|
| 5. |
Detach the clips, then remove the wiring harness(C).
|
| 6. |
Installation is the reverse of removal.
|
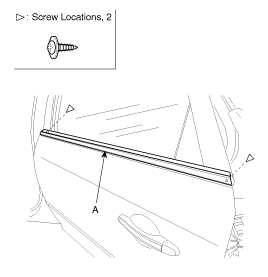
Door Belt Weatherstrip Replacement
| 1. |
Loosen the mounting screw, then remove the door belt weatherstrip
(A).
|
| 2. |
Installation is the reverse of removal.
|
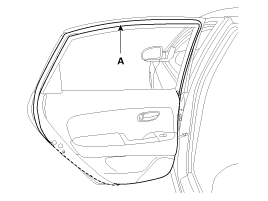
Door Weathherstrip Replacement
| 1. |
Loosen the checker mounting bolts.
|
| 2. |
Detach the clips, then remove the weatherstrip(A).
|
| 3. |
Installation is the reverse the removal.
|
Door Panel Replacement
| 1. |
Remove the following parts.
|
| 2. |
After loosening the mounting bolts, then remove the door panel
(A).
|
| 3. |
Installation is the reverse the removal.
|
Adjustment
Glass Adjustment
|
| 1. |
Remove the following parts.
|
| 2. |
Carefully move the glass (A) until you can see the glass mounting
screw (B), then loosen them.
|

| 3. |
Push the glass (A) against the channel (C), then tighten the glass
mounting bolts.
|
| 4. |
Check that the glass moves smoothly.
|
| 5. |
Raise the glass fully, and check for gaps.
|
| 6. |
Check that the glass contacts the glass run channel evenly.
|
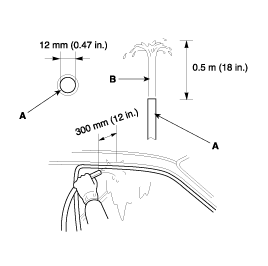
| 7. |
Check for water leaks. Run water over the roof and on the sealing
area as shown, and note these items:
|
Door Position Adjustment
|
| 1. |
Place the vehicle on a firm, level surface when adjusting the
doors.
|
| 2. |
Adjust at the hinges (A):
|
| 3. |
Check that the door and body edges are parallel.
|
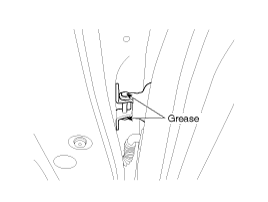
| 4. |
Grease the pivot portions of the hinges indicated by the arrows.
|
| 5. |
Check for water leaks.
|
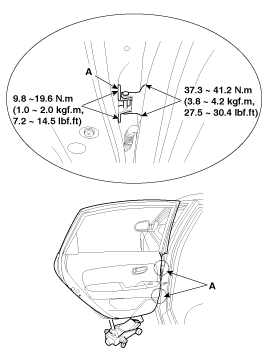
Door Striker Adjustment
Make sure the door latches securely without slamming it.
If necessary adjust the striker (A): The striker nuts are fixed.
The striker can be fine adjusted up or down, and in or out.
| 1. |
Loosen the screws (B), then insert a shop towel between the body
and striker.
|

| 2. |
Lightly tighten the screws.
|
| 3. |
Wrap the striker with a shop towel, then adjust the striker by
tapping it with a plastic hammer.
Do not tap the striker too hard.
|
| 4. |
Loosen the screws and remove the shop towel.
|
| 5. |
Lightly tighten the screws.
|
| 6. |
Hold the outer handle out, and push the door against the body
to be sure the striker allows a flush fit. If the door latches properly,
tighten the screws and recheck.
|


