 Hyundai Elantra CN7: Timing System
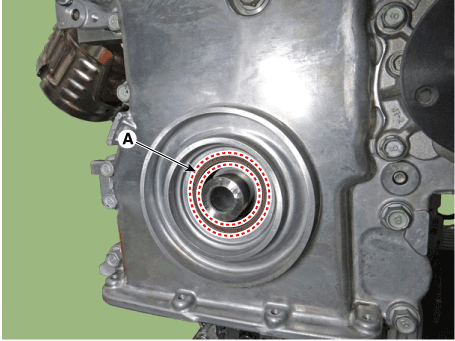
Front Oil Seal
Repair procedures
| Replacement |
| 1. | Remove the crankshaft damper pulley. (Refer to Drive Belt System - "Crankshaft Damper Pulley") |
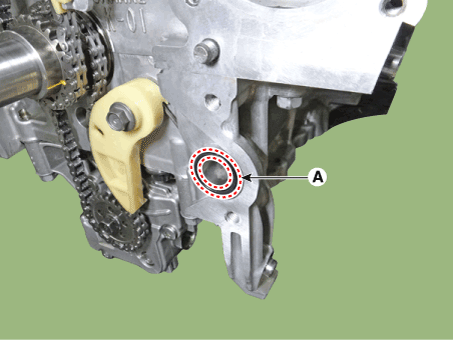
| 2. | Remove the front oil seal (A).
|
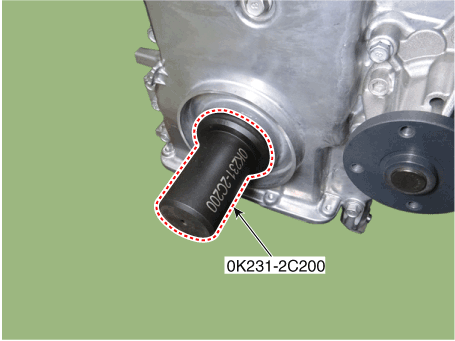
| 3. | Using the SST (0K231-2C200), install a new front oil seal.
|

| 4. | Install in the reverse order of removal. |
Timing Chain Cover
Repair procedures
| Removal |
|
|

| 1. | Disconnect the battery negative terminal. |
| 2. | Remove the engine cover. (Refer to Engine and Transaxle Assembly - "Engine Cover") |
| 3. | Remove the engine room under cover. (Refer to Engine And Transaxle Assembly - "Engine Room Under Cover") |
| 4. | Drain the engine coolant. (Refer to Cooling System - "Coolant") |
| 5. | Drain the engine oil. (Refer to Lubrication System - "Engine Oil") |
| 6. | Remove the drive belt. (Refer to Drive Belt System - "Drive Belt") |
| 7. | Remove the drive belt tensioner. (Refer to Drive Belt System - "Drive Belt Tensioner") |
| 8. | Remove the alternator. (Refer to Engine Electrical System - "Alternator") |
| 9. | Remove the crankshaft damper pulley. (Refer to Drive Belt System - "Crankshaft Damper Pulley") |
| 10. | Remove the cylinder head cover. (Refer to Cylinder Head Assembly - "Cylinder Head Cover") |
| 11. | Remove the water pump. (Refer to Cooling System - "Water Pump") |
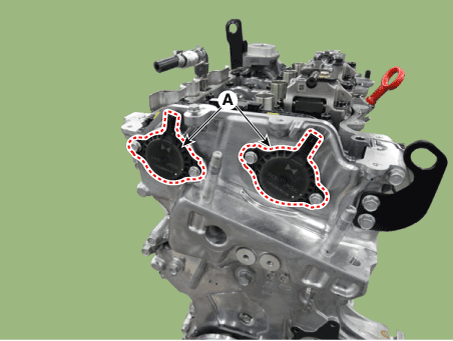
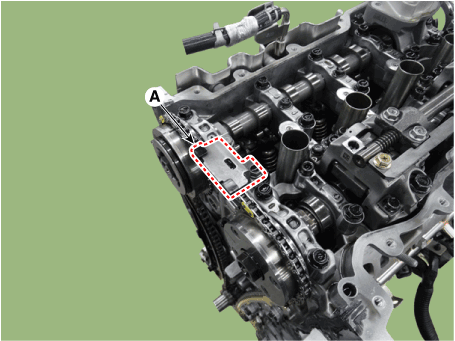
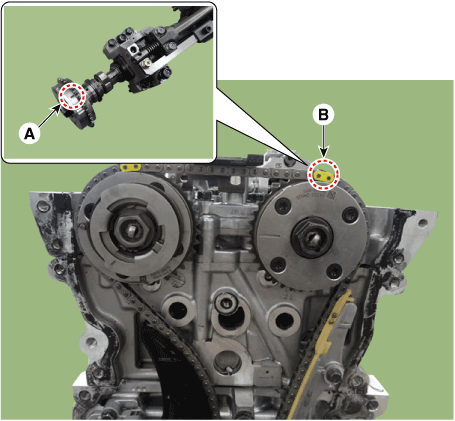
| 12. | Remove the intake and exhaust variable force solenoid (VFS) valves (A).
|
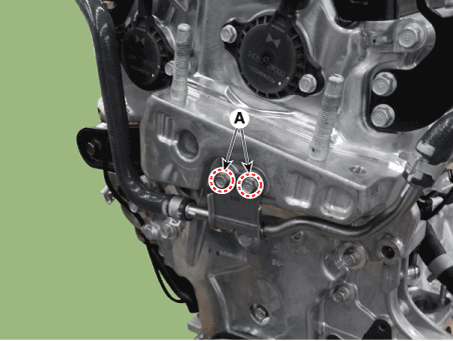
| 13. | Remove the turbo charger coolant hose and pipe mounting bolts (A).
|
| 14. | Remove the oil pan. (Refer to Lubrication System - "Oil Pan") |
| 15. | Insert the rubber block between jack and lower crankcase. |
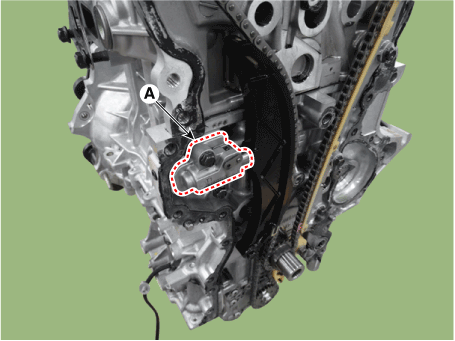
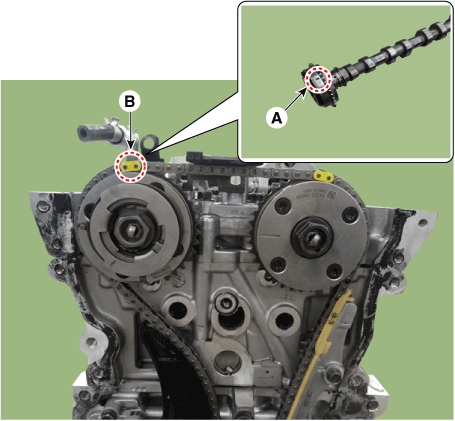
| 16. | Remove the engine mounting support bracket (A).
|
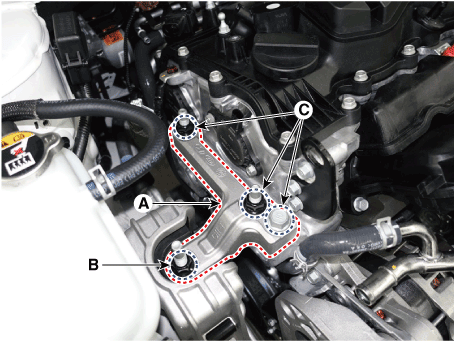
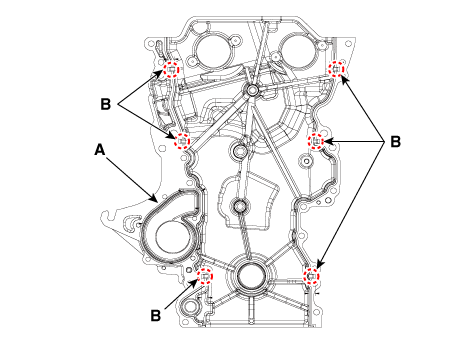
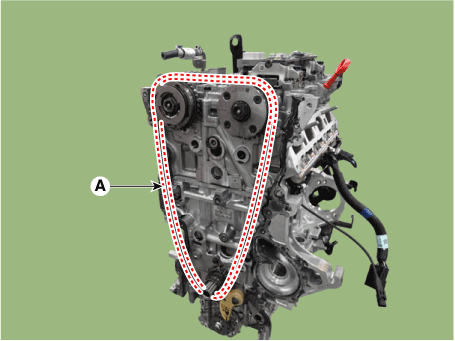
| 17. | Remove the timing chain cover (A) and hanger (B).
|
| Installation |
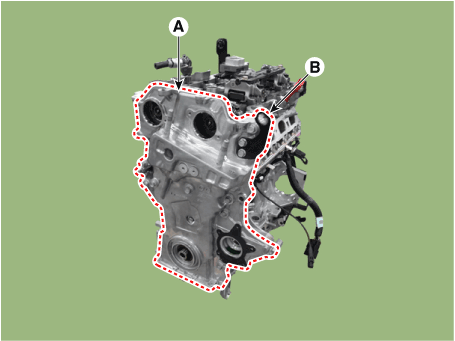
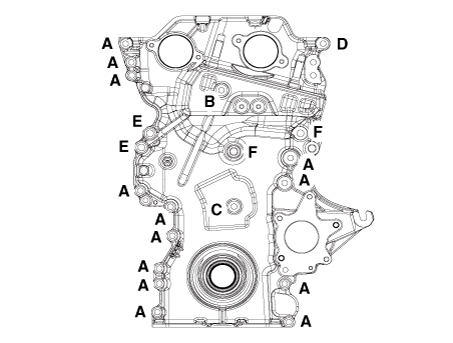
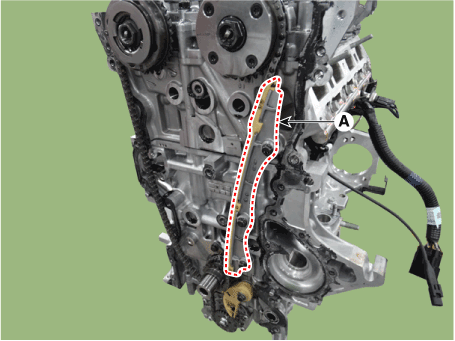
| 1. | Install the new O-ring (A).
|
| 2. | Install the timing chain cover.
|
| 3. | Replace the front oil seal. (Refer to Timing System - "Front Oil Seal") |
| 4. | Install the other parts in the reverse order of removal. |
| 5. | Refill engine with engine oil. (Refer to Lubrication System - "Engine Oil") |
| 6. | Fill with engine coolant. (Refer to Cooling System - "Coolant")
|
Timing Chain
Components and components location
| Components |
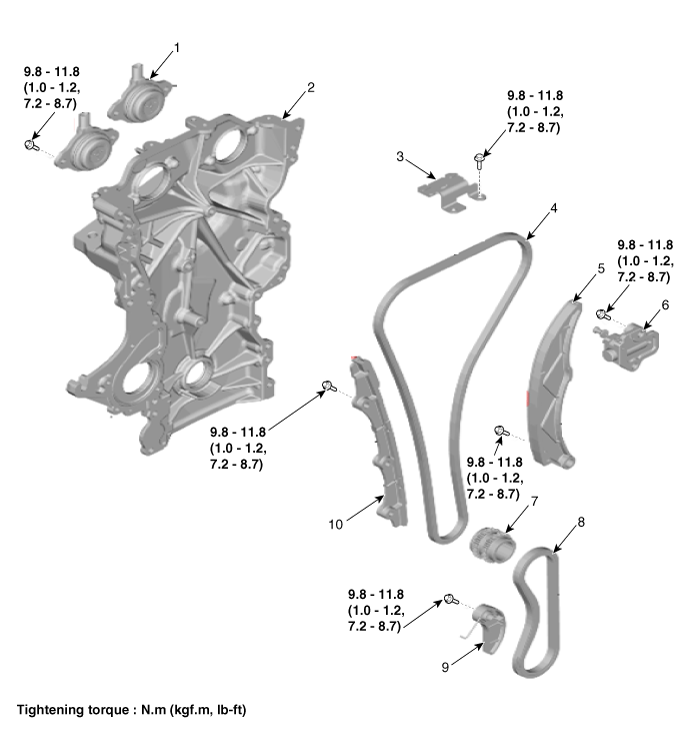
| 1. Variable force solenoid valves 2. Timing chain cover 3. Cam to cam guide 4. Timing chain 5. Timing chain tensioner arm | 6. Timing chain tensioner 7. Crankshaft sprocket 8. Oil pump chain 9. Oil pump chain tensioner 10. Timing chain guide |
Repair procedures
| Removal |
| 1. | Disconnect the battery negative terminal. |
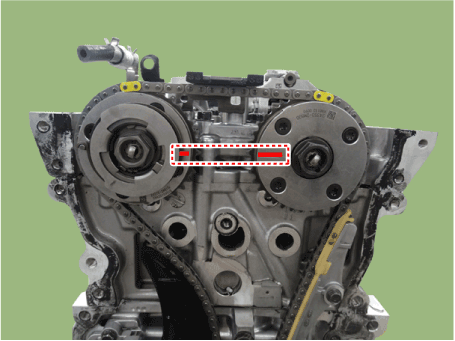
| 2. | Turn the crankshaft damper pulley clockwise, and align its groove with the timing mark of the timing chain cover.
|
| 3. | Remove the timing chain cover. (Refer to Timing System - "Timing Chain Cover") |
| 4. | Remove the cam to cam guide (A).
|
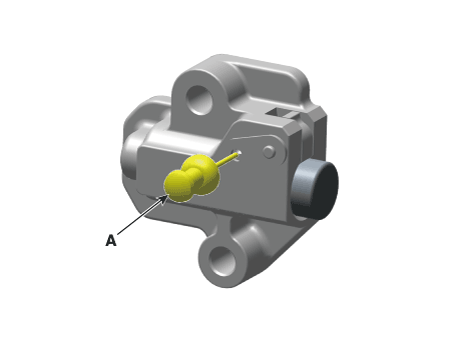
| 5. | Remove the timing chain tensioner (A).
|
| 6. | Remove the timing chain tensioner arm (A).
|
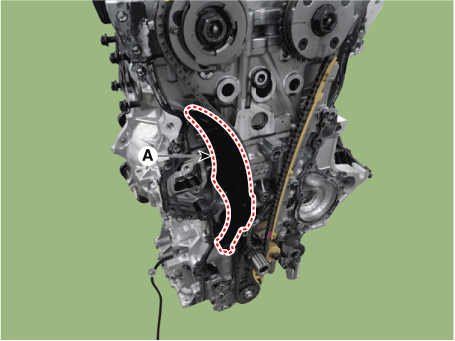
| 7. | Remove the timing chain (A).
|
| 8. | Remove the timing chain guide (A).
|
| 9. | Remove the oil pump chain. (Refer to Lubrication System - "Oil Pump") |
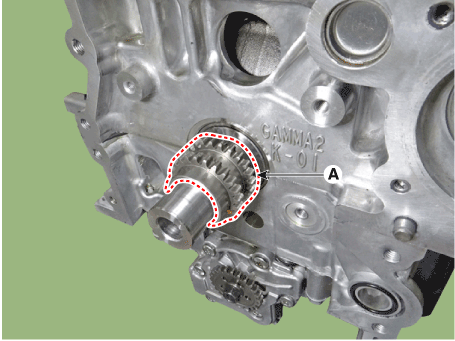
| 10. | Remove the crankshaft sprocket (A).
|
| Inspection |
Sprockets, Hydraulic Tensioner, Chain Guide, Chain Tensioner Arm
| 1. | Check the camshaft sprocket, crankshaft sprocket teeth for abnormal wear, cracks or damage. Replace if necessary. |
| 2. | Check a contact surface of the chain tensioner arm and guide for abnormal wear, cracks or damage. Replace if necessary. |
| 3. | Check the hydraulic tensioner for its piston stroke and ratchet operation. Replace if necessary. |
| Installation |
| 1. | Install the crankshaft sprocket (A).
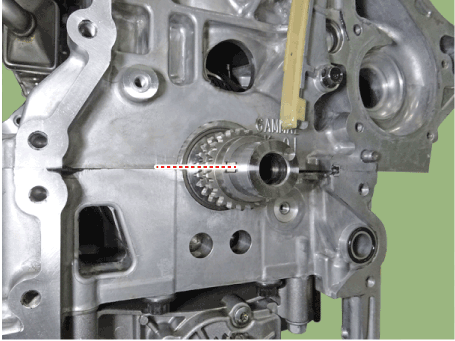
|
| 2. | Place the crankshaft key at the left 180°.
|
| 3. | Install the oil pump chain. (Refer to Lubrication System - "Oil Pump") |
| 4. | Install the timing chain (A).
|
| 5. | Install the timing chain guide (A).
|
| 6. | Install the timing chain tensioner arm (A).
|
| 7. | Install the timing chain tensioner (A).
|
| 8. | Install the cam to cam guide (A).
|
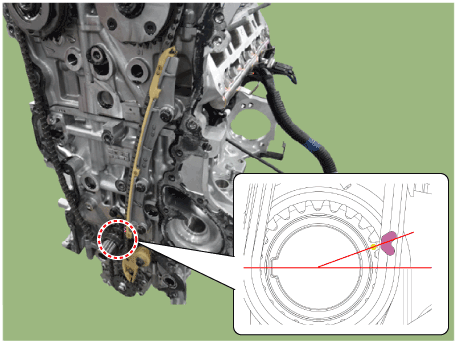
| 9. | After rotating crankshaft 2 revolutions in regular direction (clockwise viewed from front), confirm that the TDC marks on the intake and exhaust CVVT sprockets are aligned with the top surface of cylinder head.
|
| 10. | Install the timing chain cover. (Refer to Timing System - "Timing Chain Cover") |
| 11. | Install the other parts in the reverse order of removal. |


