 Hyundai Elantra CN7: Fuel Delivery System
Components and components location
| Components Location |
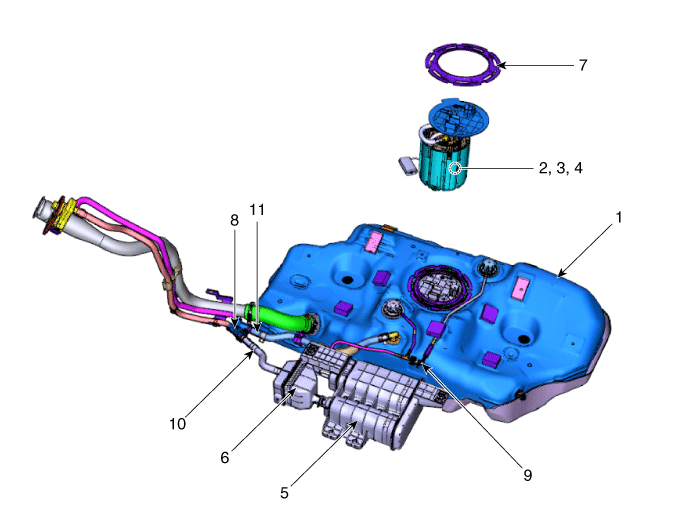
| 1. Fuel Tank 2. Fuel Pump 3. Fuel Fiter 4. Fuel Pressure Regulator 5. Canister 6. Fuel tank air filter | 7. Fuel pump plate cover 8. Fuel filler hose 9. Vapor hose 10. Ventilation hose 11. Leveling hose |
Fuel pressure test
| Fuel Pressure Test |
| 1. | Release the residual pressure in fuel line. (Refer to Fuel Delivery System - "Release Residual Pressure in Fuel Line")
|

| 2. | Install the Special Service Tool (SST).
|

| 3. | Inspect fuel leakage on connections among the fuel feed tube, the delivery pipe, and the SST components with IG ON. |
| 4. | Measure Fuel Pressure.
|

| 5. | Release the residual pressure in fuel line. (Refer to Fuel Delivery System - "Release Residual Pressure in Fuel Line")
|
| 6. | Test End
|
Release residual pressure in fuel line
| Release Residual Pressure in Fuel Line |
|
| 1. | Turn the ignition switch OFF and disconnect the battery (-) cable. |
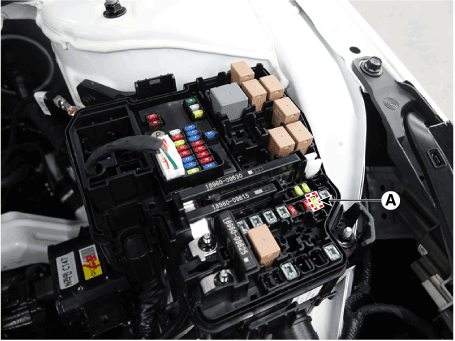
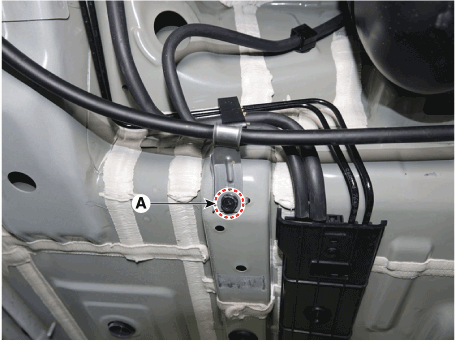
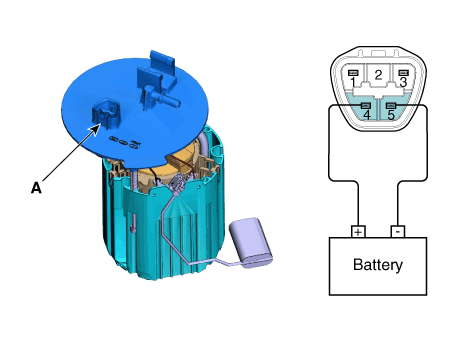
| 2. | Remove the fuel pump fuse (A).
|
| 3. | Connect the battery (-) cable. |
| 4. | Start the engine and let idle, and then turn the ignition switch OFF after the engine has stopped on its own. |
| 5. | Disconnect the battery (-) cable, and then install the fuel pump fuse. |
| 6. | Connect the battery (-) cable. |
| 7. | Delete the Diagnostic Trouble Code (DTC) related the fuel pump fuse with the diagnostic tool.
|
Fuel Tank
Repair procedures
| Removal |
| 1. | Release the residual pressure in fuel line. (Refer to Fuel Delivery System - "Release Residual Pressure in Fuel Line") |
| 2. | Turn ignition switch OFF and disconnect the negative (-) battery cable. |
| 3. | Remove the rear seat. (Refer to Body - "Rear Seat Assembly") |
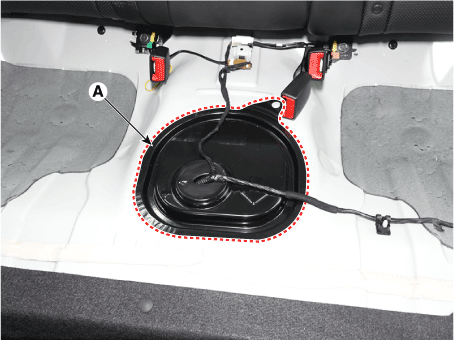
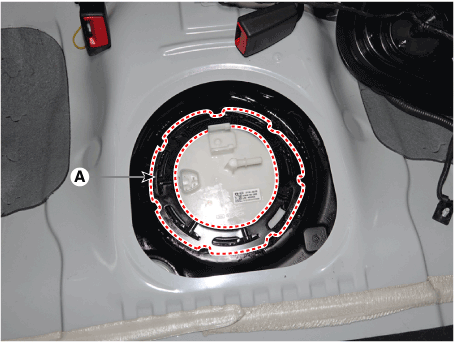
| 4. | Remove the fuel pump service cover (A).
|
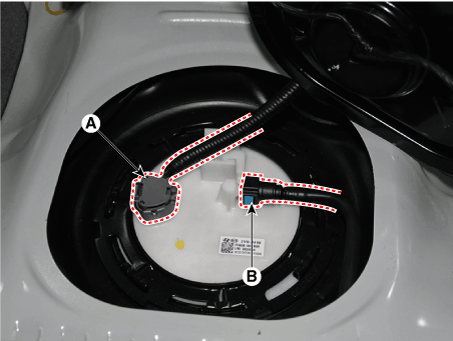
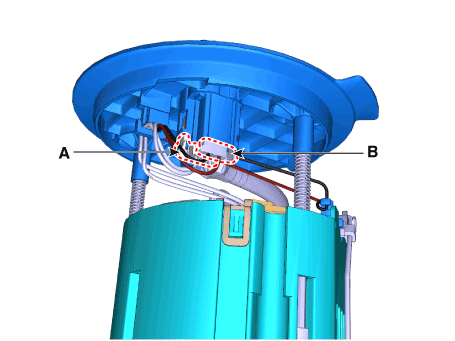
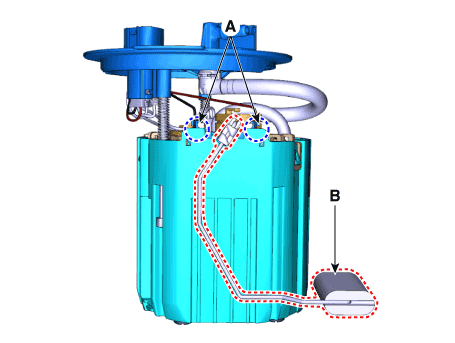
| 5. | Disconnect the fuel pump connector (A). |
| 6. | Disconnect the fuel feed tube quick-connector (B).
|
| 7. | Disconnect the leveling hose (A). |
| 8. | Disconnect the fuel filler hose (B).
|
| 9. | Disconnect the vapor hose quick-connector (A)
|
| 10. | Remove the floor under cover (A).
|
| 11. | Separate the brake line after removing the bracket mounting bolt (A).
|
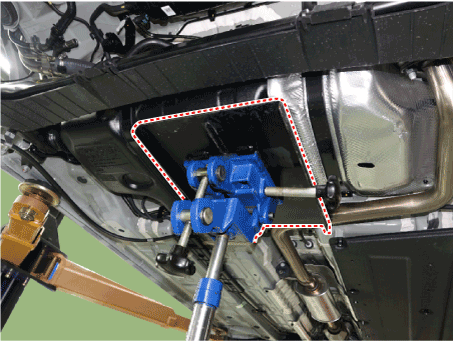
| 12. | Remove the fuel tank band (A).
|
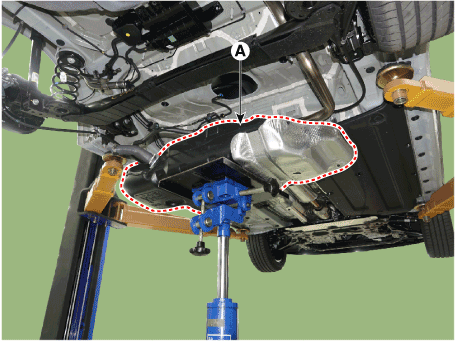
| 13. | Remove the fuel tank (A).
|
| Installation |
| 1. | Install in the reverse order of removal. |
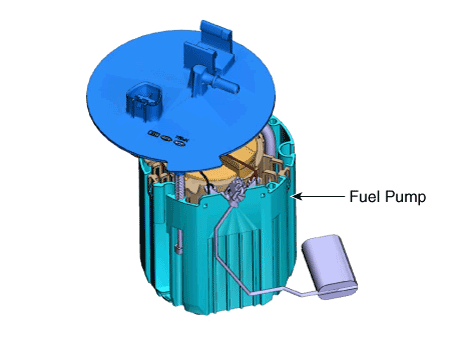
Fuel Pump
Repair procedures
| Inspection |
[Fuel Pump]
| 1. | Turn ignition switch OFF and disconnect the negative (-) battery cable. |
| 2. | Remove the fuel pump assembly. |
| 3. | Check motor operation by fuel pump connector (A) connecting power (No.4) and ground (No.5).
|
[Fuel Sender]
| 1. | Turn ignition switch OFF and disconnect the negative (-) battery cable. |
| 2. | Remove the fuel pump assembly. |
| 3. | Using an ohmmeter, measure the resistance between terminals 1 and 3 of sender connector (A) at each float level.
|
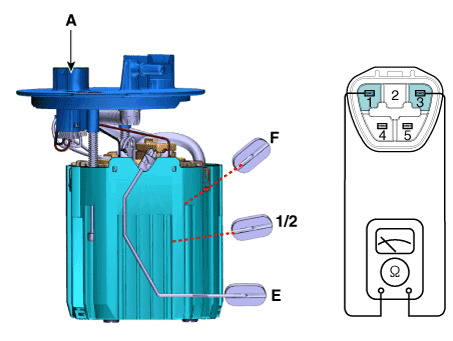
| 4. | Also check that the resistance changes smoothly when the float is moved from "E" to "F".
|
| Removal |
| 1. | Turn the ignition switch OFF and disconnect the battery (-) terminal. |
| 2. | Release the residual pressure in fuel line. (Refer to Fuel Delivery System - "Release Residual Pressure in Fuel Line") |
| 3. | Remove the rear seat. (Refer to Body (Interior and Exterior) - "Rear Seat Assembly") |
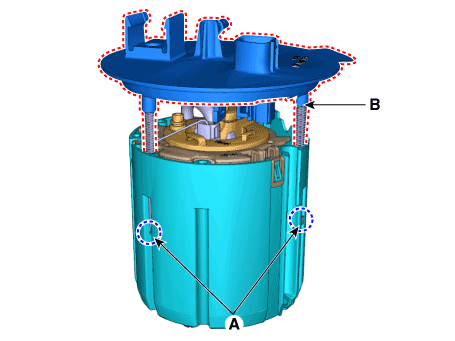
| 4. | Remove the fuel pump service cover (A).
|
| 5. | Disconnect the fuel pump connector (A). |
| 6. | Disconnect the fuel feed tube quick-connector (B).
|
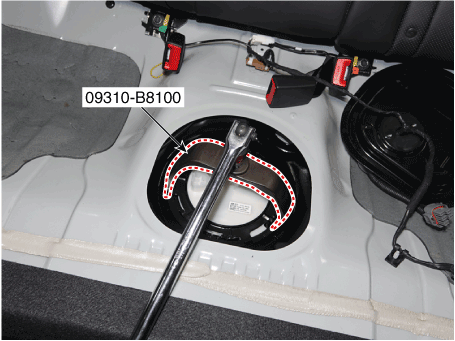
| 7. | Remove the locking ring (A) by using the special service tool [No. : 09310-B8100].
|
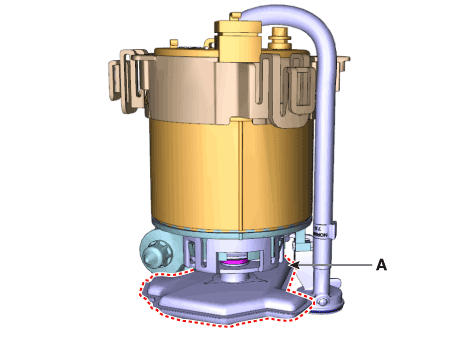
| 8. | Remove the fuel pump from the fuel tank.
|
| Installation |
| 1. | Install in the reverse order of removal.
|
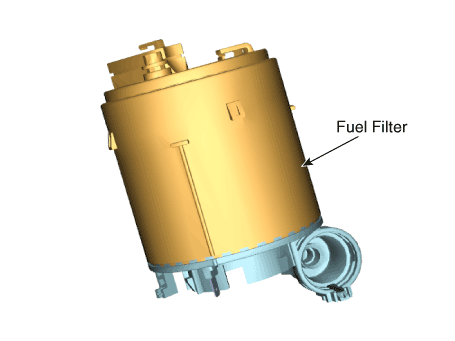
Fuel Filter
Repair procedures
| Removal |
| 1. | Remove the fuel pump. (Refer to Fuel Delivery System - "Fuel Pump") |
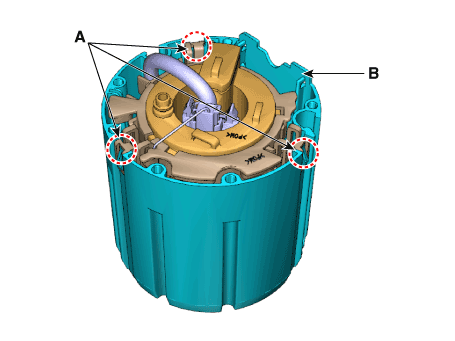
| 2. | Disconnect the fuel pump motor connector (A) and fuel sender connector (B).
|
| 3. | Release the fixing hook (A) and then remove the fuel sender (B).
|
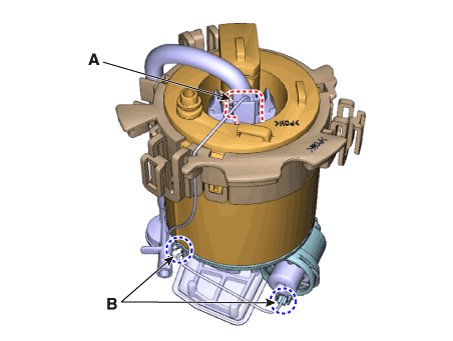
| 4. | Remove the fixing clip (A) and then disconnect the fuel feed tube (B).
|
| 5. | Remove the fixing clip (A) and then remove the head assembly (B).
|
| 6. | Release the fixing hook (A) and then remove the reservoir-cup (B).
|
| 7. | Disconnect the fuel pump motor connector (A). |
| 8. | Disconnect the ground cable (B).
|
| 9. | Remove the fixing clip (A) and then disconnect the fuel pressure regulator (B).
|
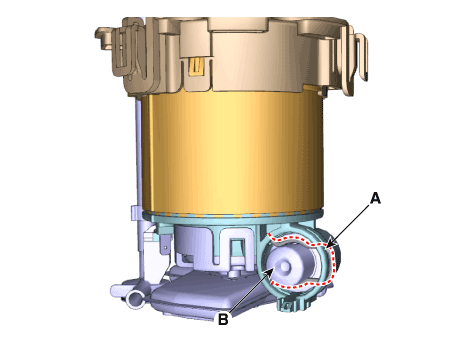
| 10. | Release the fixing hook and then remove the free filter (A).
|
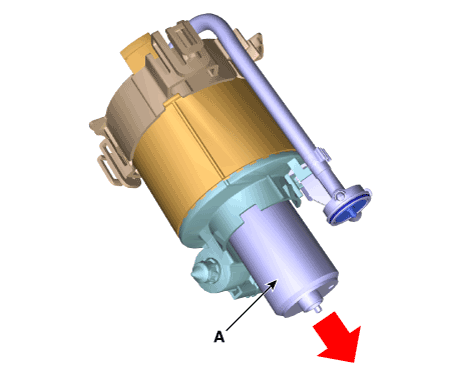
| 11. | Remove the fuel pump motor (A) from the fuel filter.
|
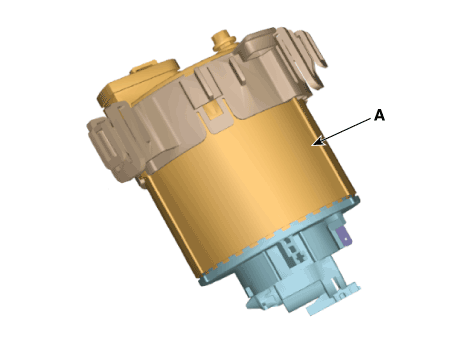
| 12. | Release the fixing hook and then remove the fuel filter (A) from the bracket.
|
| Installation |
| 1. | Install in the reverse order of removal. |
Fuel Pump Motor
Repair procedures
| Removal |
| 1. | Remove the fuel pump. (Refer to Fuel Delivery System - "Fuel Pump") |
| 2. | Disconnect the fuel pump motor connector (A) and fuel sender connector (B).
|
| 3. | Release the fixing hook (A) and then remove the fuel sender (B).
|
| 4. | Remove the fixing clip (A) and then disconnect the fuel feed tube (B).
|
| 5. | Remove the fixing clip (A) and then remove the head assembly (B).
|
| 6. | Release the fixing hook (A) and then remove the reservoir-cup (B).
|
| 7. | Disconnect the fuel pump motor connector (A). |
| 8. | Disconnect the ground cable (B).
|
| 9. | Remove the fixing clip (A) and then disconnect the fuel pressure regulator (B).
|
| 10. | Release the fixing hook and then remove the free filter (A).
|
| 11. | Remove the fuel pump motor (A) from the fuel filter.
|

| Installation |
| 1. | Install in the reverse order of removal. |
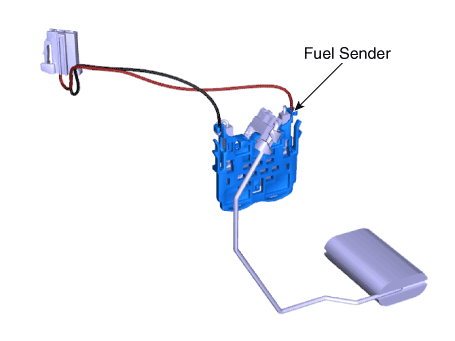
Fuel Sender Assembly
Repair procedures
| Removal |
| 1. | Remove the fuel pump. (Refer to Fuel Delivery System - "Fuel Pump") |
| 2. | Disconnect the fuel pump motor connector (A) and fuel sender connector (B).
|
| 3. | Release the fixing hook (A) and then remove the fuel sender (B).
|
| Installation |
| 1. | Install in the reverse order of removal. |
Fuel Pressure Regulator
Repair procedures
| Removal |
| 1. | Remove the fuel pump. (Refer to Fuel Delivery System - "Fuel Pump") |
| 2. | Disconnect the fuel pump motor connector (A) and fuel sender connector (B).
|
| 3. | Release the fixing hook (A) and then remove the fuel sender (B).
|
| 4. | Remove the fixing clip (A) and then disconnect the fuel feed tube (B).
|
| 5. | Remove the fixing clip (A) and then remove the head assembly (B).
|
| 6. | Release the fixing hook (A) and then remove the reservoir-cup (B).
|
| 7. | Disconnect the fuel pump motor connector (A). |
| 8. | Disconnect the ground cable (B).
|
| 9. | Remove the fixing clip (A) and then disconnect the fuel pressure regulator (B).
|

| Installation |
| 1. | Install in the reverse order of removal. |
Fuel Line
Repair procedures
| Removal |
[Low Fuel Line]
| 1. | Release the residual pressure in fuel line. (Refer to Fuel Delivery System - "Release Residual Pressure in Fuel Line") |
| 2. | Turn ignition switch OFF and disconnect the battery negative (-) terminal. |
| 3. | Remove the air cleaner assembly. (Refer to Engine Mechanical System - "Air Cleaner") |
| 4. | Remove the battery and battery tray. (Refer to Engine Electrical System - " Battery") |
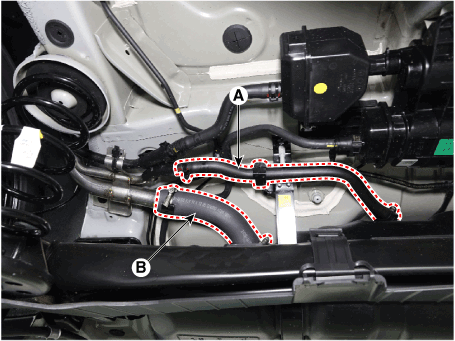
| 5. | Disconnect the fuel feed tube quick-connector (A).
|
| 6. | Disconnect the vapor quick-connector (A) which is connected from the PCSV.
|
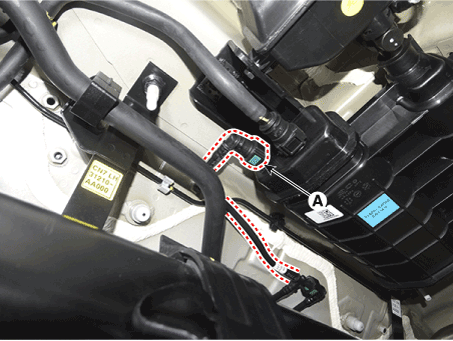
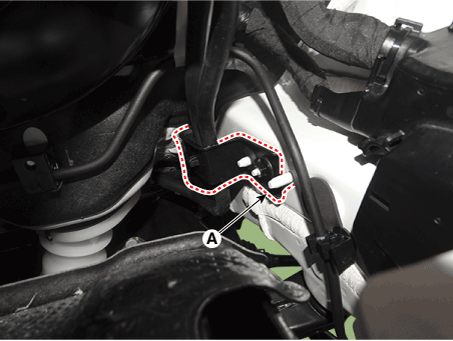
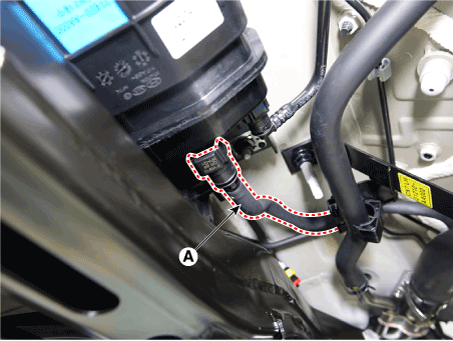
| 7. | Remove the bracket (A) after loosening the nut.
|
| 8. | Lift the vehicle. |
| 9. | Remove the fuel tank. (Refer to Fuel Delivery System - "Fuel Tank") |
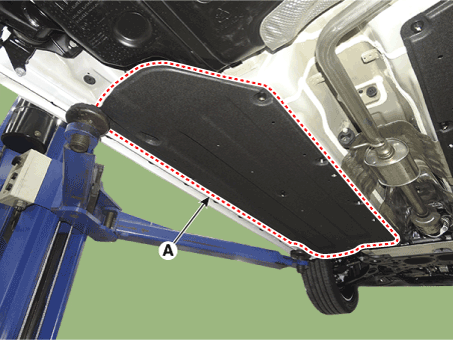
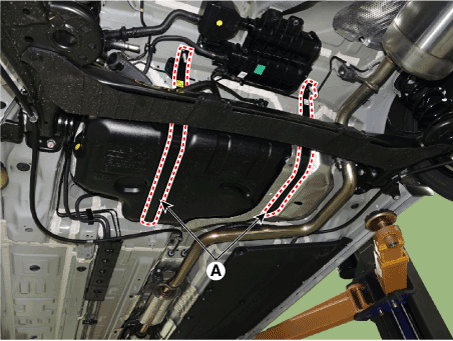
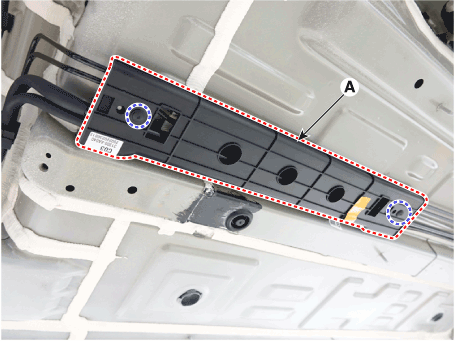
| 10. | Remove the side under cover (A).
|

| 11. | Remove the hit protector (A).
|
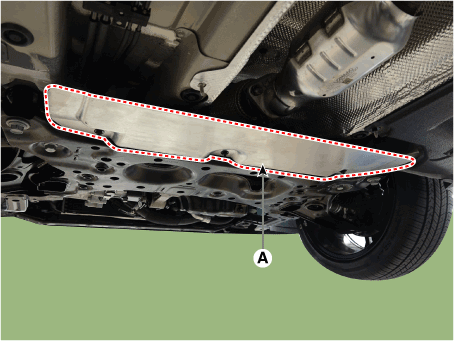
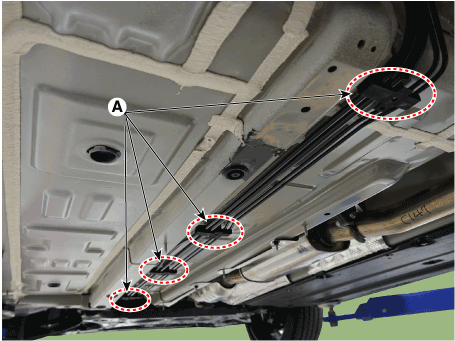
| 12. | Remove the fuel and brake line protector (A).
|
| 13. | Disconnect the vapor quick-connector (A).
|
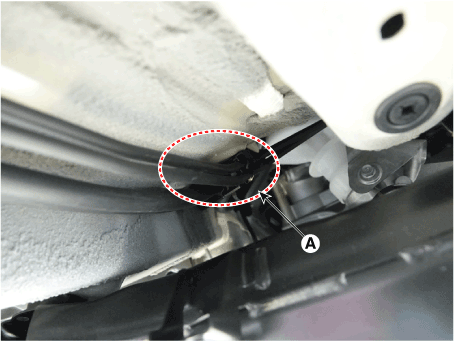
| 14. | Remove the fuel line fixing clip (A).
|

[High Fuel Line]
| 1. | Release the residual pressure in fuel line. (Refer to Fuel Delivery System - "Release Residual Pressure in Fuel Line") |
| 2. | Turn ignition switch OFF and disconnect the battery negative (-) terminal. |
| 3. | Remove the air cleaner assembly. (Refer to Engine Mechanical System - "Air Cleaner") |
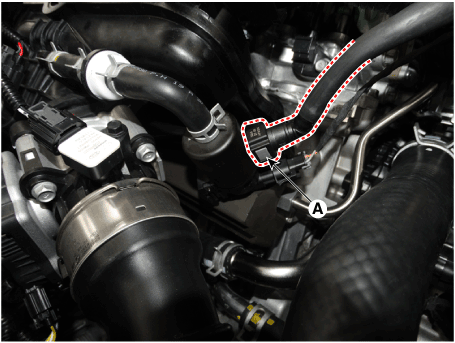
| 4. | Disconnect the engine wiring connector and harness clamps.
|
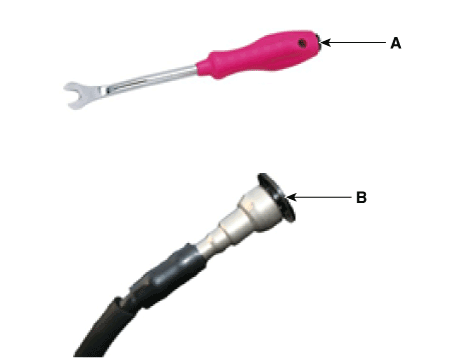
| 5. | Use the special service tool [SST No. : 09314-3Q100 or 09314-27130] to remove the high pressure fuel pipe function block mounting bolt (A) and removing the flange nut (B).
|

| Installation |
| 1. | Install in the reverse order of removal. |
Accelerator Pedal
Repair procedures
| Removal |
| 1. | Turn the ignition switch OFF and disconnect the negative (-) battery cable. |
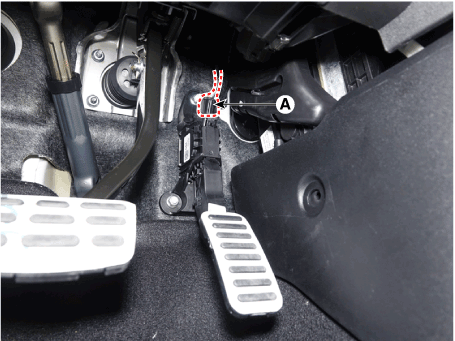
| 2. | Disconnect the accelerator position sensor connector (A).
|
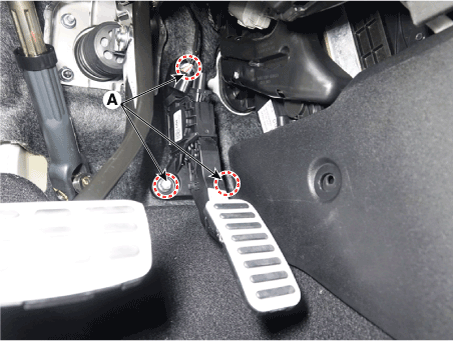
| 3. | Remove the installation nuts, and then remove the accelerator pedal module (A).
|
| Installation |
| 1. | Install in the reverse order of removal. |
Delivery Pipe
Repair procedures
| Removal |
|

| 1. | Release the residual pressure in fuel line. (Refer to Fuel Delivery System - "Release Residual Pressure in Fuel Line") |
| 2. | Turn the ignition switch OFF and disconnect the battery negative (-) cable.
|
| 3. | Remove the intake manifold. (Refer to Engine Mechanical System - "Intake Manifold") |
| 4. | Use the special service tool [SST No. : 09314-3Q100 or 09314-27130] to remove the high pressure fuel pipe function block mounting bolt (A) and removing the flange nut (B).
|
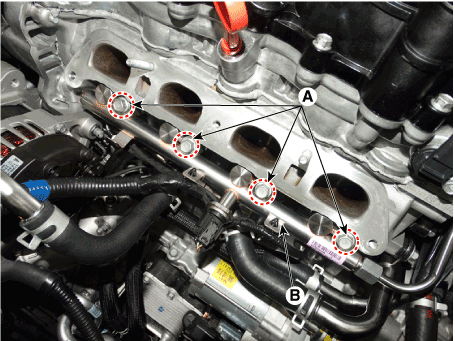
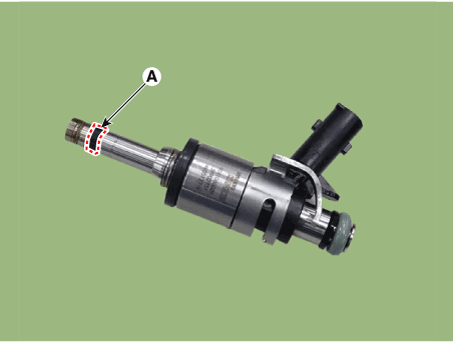
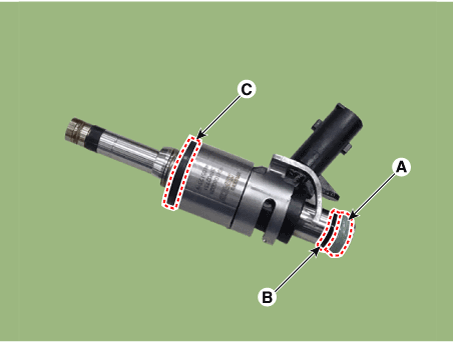
| 5. | Remove the installation bolt (A), and then remove the delivery pipe and injector assembly (B).
|
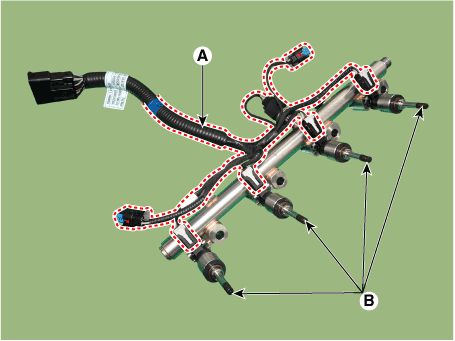
| 6. | Disconnect the injector & rail pressure sensor connector (A). |
| 7. | Remove the fixing clip (A), and then separate the injector from the delivery pipe
|
| Installation |
| 1. | Install in the reverse order of removal.
|
High Pressure Fuel Pump
Repair procedures
| Removal |
|
| 1. | Release the residual pressure in fuel line. (Refer to Fuel Delivery System - "Release Residual Pressure in Fuel Line") |
| 2. | Turn the ignition switch OFF and disconnect the battery negative (-) cable.
|
| 3. | Remove the air cleaner assembly. (Refer to Engine Mechanical System - "Air Cleaner") |
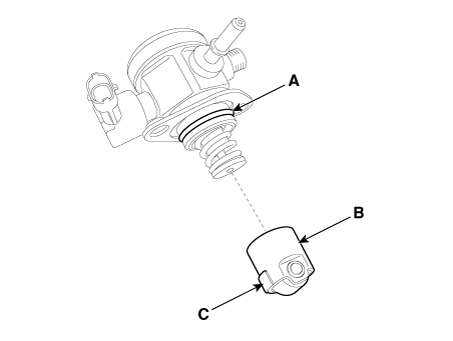
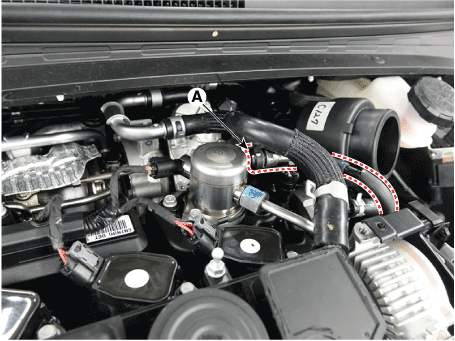
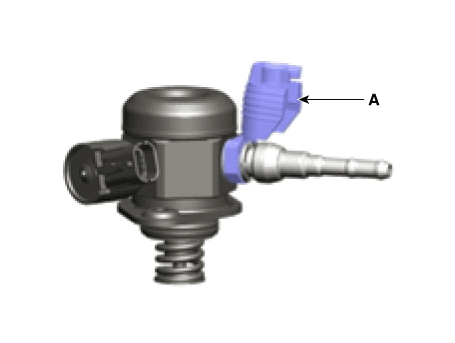
| 4. | Disconnect the fuel pressure control valve connector (A). |
| 5. | Disconnect the fuel feed tube quick-connector (B).
|
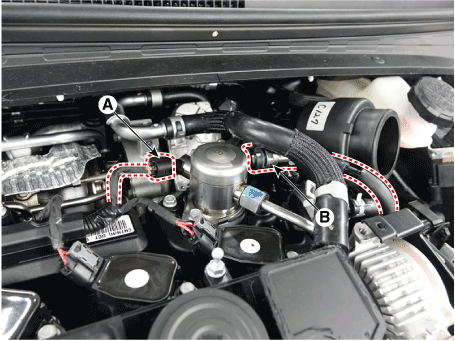
| 6. | Disconnect the engine wiring connector and harness clamps.
|
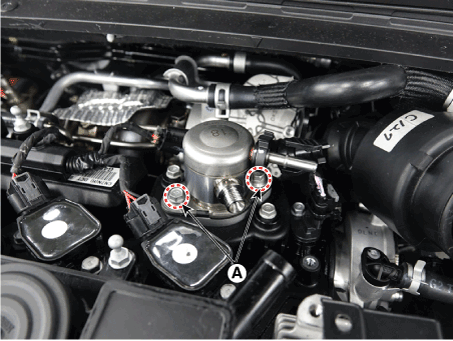
| 7. | Use the special service tool [SST No. : 09314-3Q100 or 09314-27130] to remove the high pressure fuel pipe function block mounting bolt (A) and removing the flange nut (B).
|
| 8. | Remove the mounting bolt (A) and remove the high pressure fuel pump from cylinder head assembly.
|
| Installation |
| 1. | Install in the reverse order of removal.
|