 Hyundai Elantra: Front Lower Arm. Repair procedures
Removal
| 1. |
Remove the front wheel & tire.
|
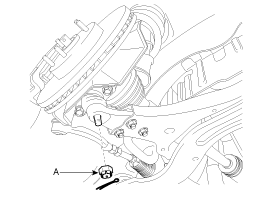
| 2. |
Remove the split pin and the castle nut (A) from the lower arm
ball joint.
|
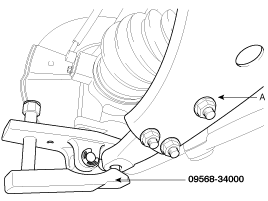
| 3. |
Separate the lower arm from the lower arm ball joint by using
SST (09568-34000).
|
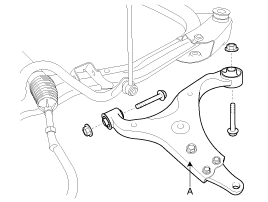
| 4. |
Loosen the bolts and nut and then remove the lower arm (A) from
the sub frame.
|
Inspection
| 1. |
Check the bushing for wear and deterioration.
|
| 2. |
Check the lower arm for deformation.
|
| 3. |
Check the all bolts and nuts
|
Installation
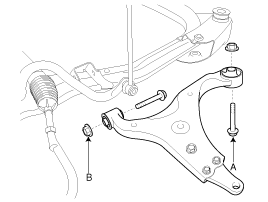
| 1. |
Install the front lower arm to the sub frame and then tighten
the bolts (A, B) and nut.
|
| 2. |
Connect the lower arm with the ball joint and then install the
castle nut (A) and the split pin.
|
| 3. |
Install the front wheel & tire.
|


