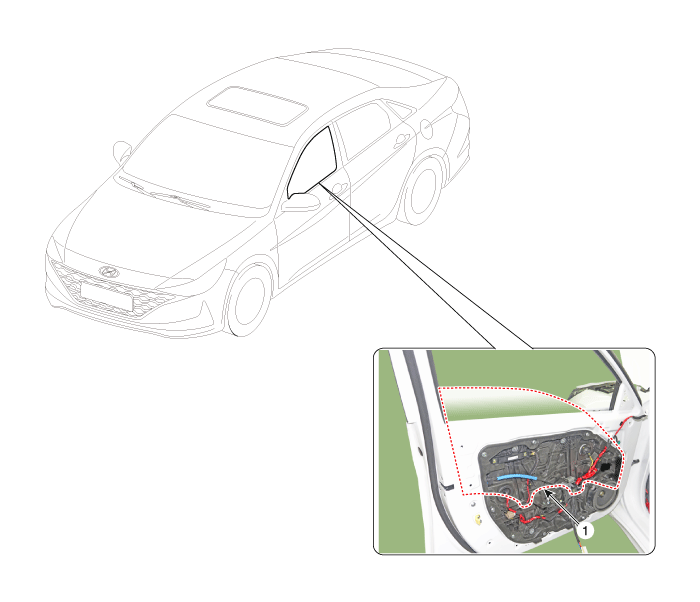
 Hyundai Elantra CN7: Front Door
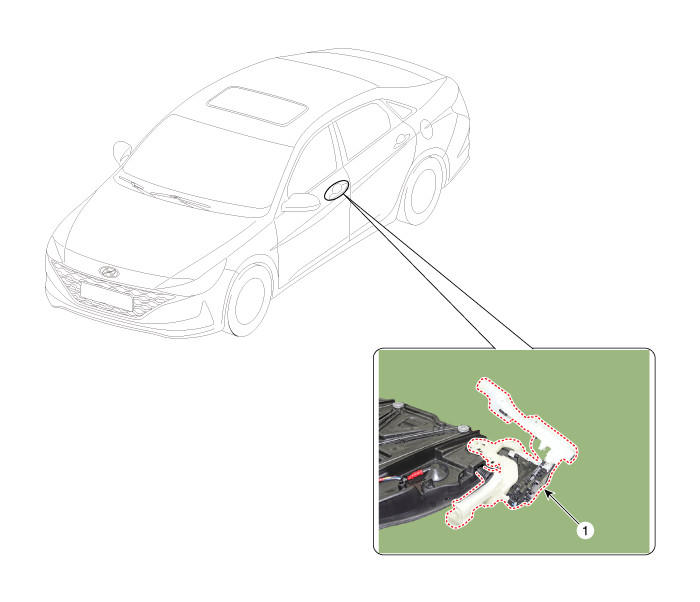
Components and components location
| Components |
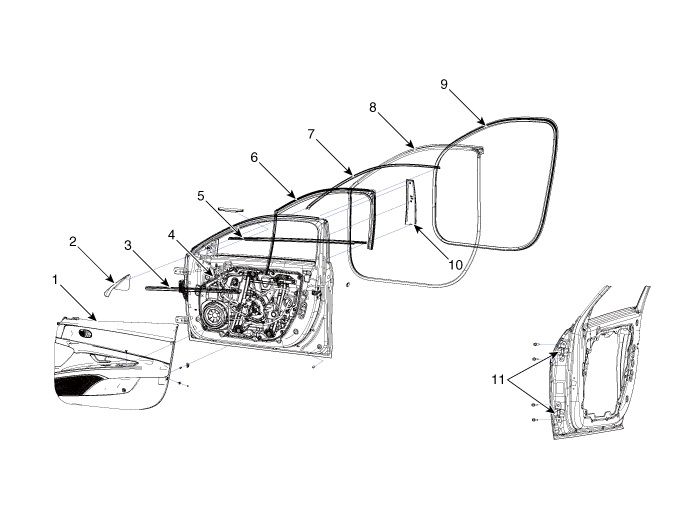
| 1.Front door trim 2. Front door quadrant inner cover 3. Front door belt inside weatherstrip 4. Front door module 5. Front door belt outside weatherstrip | 6. Front door window glass run 7. Front door frame molding 8. Front door body side weatherstrip 9. Front door side weatherstrip 10. Front door frame garnish 11. Front door hinge |
Repair procedures
| Adjustment |
Glass Adjustment
|

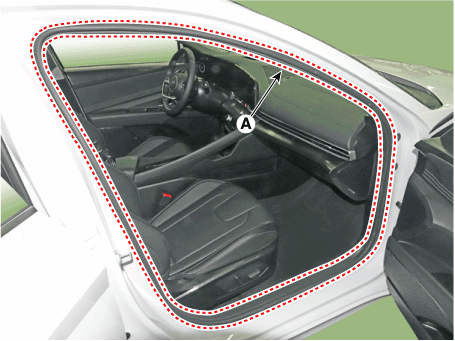
| 1. | Remove the front door trim. (Refer to Front Door - "Front Door Trim") |
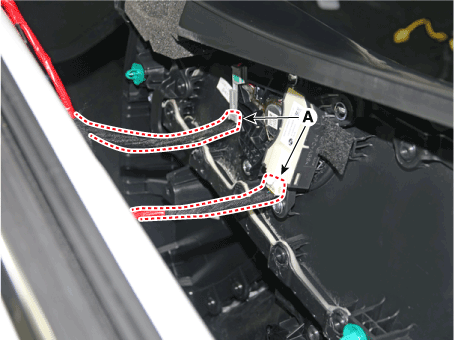
| 2. | Separate the mounting plug hole (A) from the front door module.
|

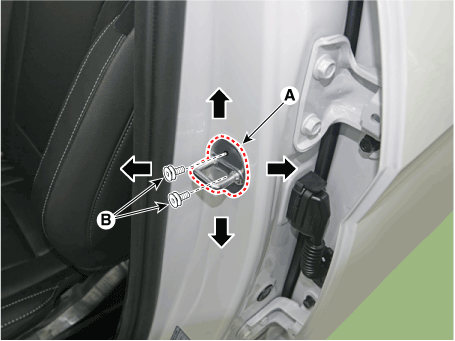
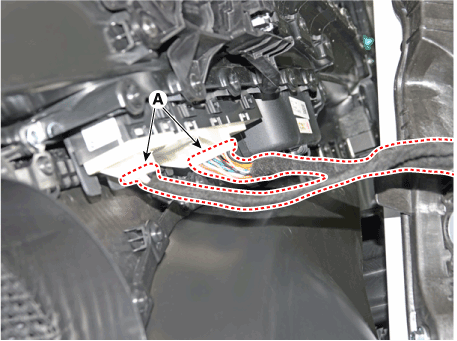
| 3. | After loosening the glass mounting bolts, adjust the spacing of the glass (A) by moving the glass from side to side and then tighten the bolts.
|
| 4. | Check the glass for normal operation. |
Door Striker Adjustment
| 1. | After loosening the mounting screw, adjust the striker (A) by moving it forward and backward or from side to side and then tighten the bolts (B).
|
| 2. | Tap on the striker with a plastic hammer to adjust the striker. The striker will not move much, but will give some adjustment. |
| 3. | Hold the outer handle out, and push the door against the body to be sure the striker allows a flush fit. If the door latches properly, tighten the screws and recheck. |
Door Position Adjustment
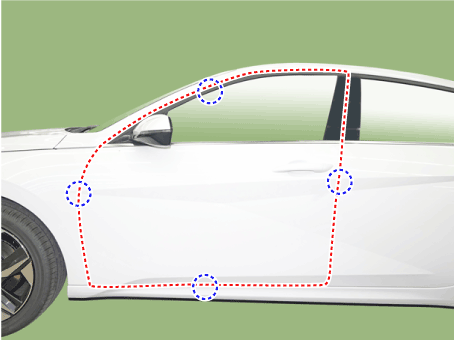
| 1. | Check that the door and body edges are parallel.
|
| 2. | Place the vehicle on a level surface before adjusting the doors. |
| 3. | Adjust the hinges (A) : - Loosen the door mounting bolts slightly, and move the door in or out until it flush with the body. - Loosen the hinge mounting bolts slightly, and move the door backward or forward, up or down as necessary. - Place a shop towel on the jack to prevent damage to the door when adjusting the door.
|

| 4. | Grease the pivot portions of the hinges indicated. |
| 5. | Check for water leaks. |
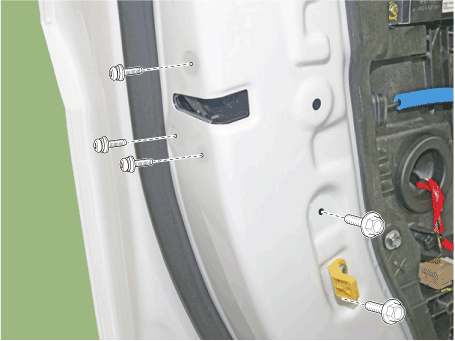
Front Door Trim
Components and components location
| Component Location |
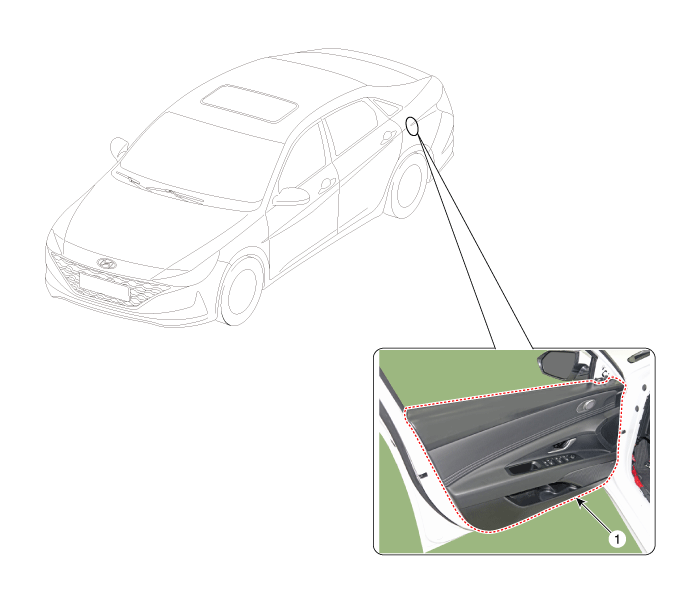
| 1. Front door trim |
Repair procedures
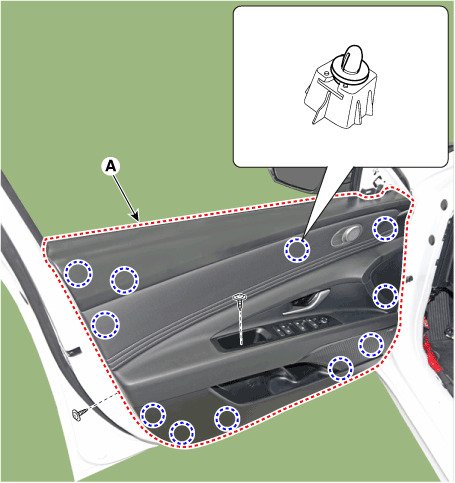
| Replacement |
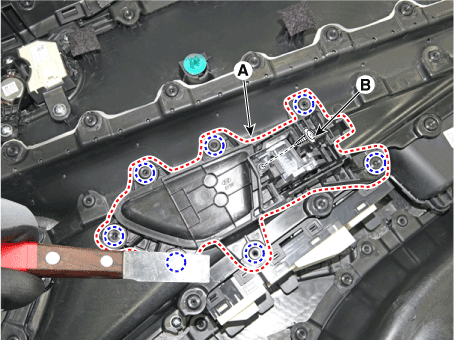
|

| 1. | Using a screwdriver or remover, remove the front door quadrant inner cover (A).
|
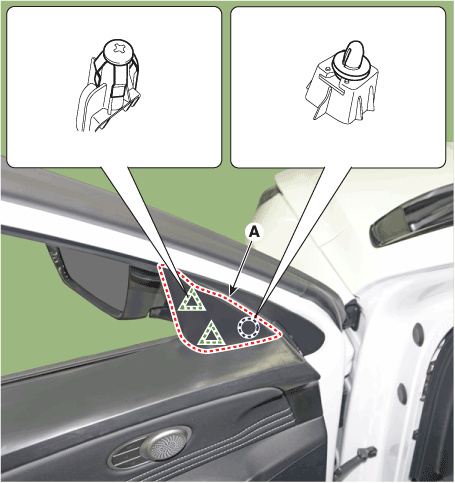
| 2. | After loosening the mounting screws, remove the lower part of the front door trim (A) using a flat - tip screwdriver.
|
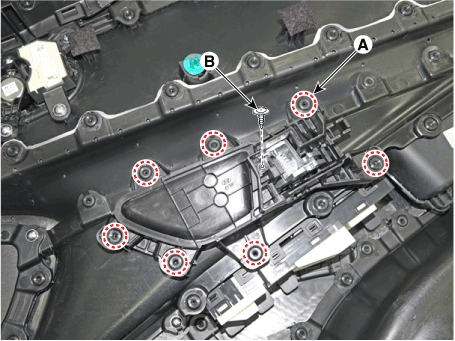
| 3. | Remove the front door inside handle cage (A).
|
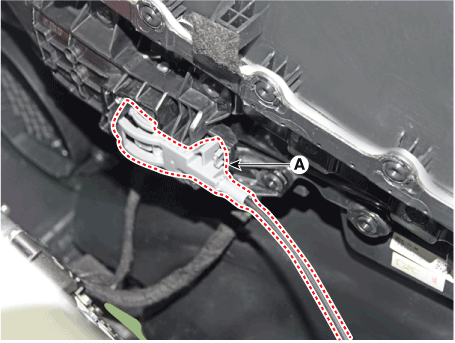
| 4. | Press the lock pin, separate the connectors (A).
|
| 5. | To install, reverse the removal procedure.
| ||||||||||||||||||
Front Door Inside Handle
Repair procedures
| Removal |
| 1. | Remove the front door trim. (Refer to Front Door - "Front Door Trim") |
| 2. | Cut the heat-welded part with a knife and loosen the mounting screw (B). |
| 3. | Remove the front door inside handle (A).
|
| Installation |
| 1. | Install the front door inside handle. |
| 2. | A screw is attached to the cut heat-welded portion.
|

Front Door Window Glass
Components and components location
| Component Location |
| 1. Front door window glass |
Repair procedures
| Replacement |
| 1. | Remove the front door trim. (Refer to Front Door - "Front Door Trim") |
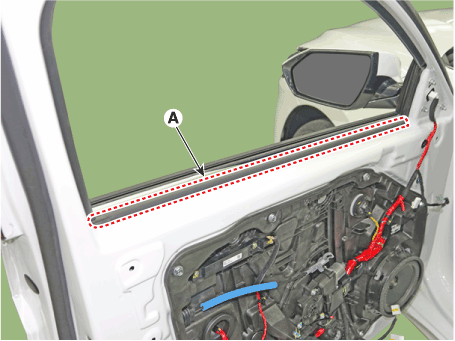
| 2. | Remove the front door belt inside weatherstrip (A).
|
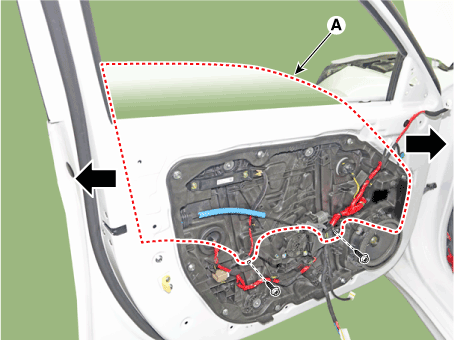
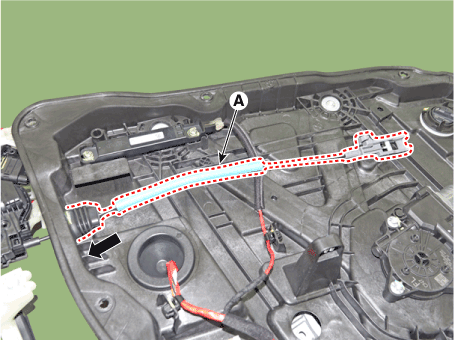
| 3. | Separate the mounting plug hole (A) from the front door module.
|
| 4. | Lower the glass by operating the power window switch until the glass mounting bolt is exposed in the plug hole.
|
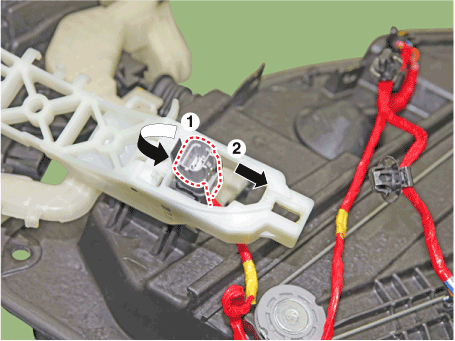
| 5. | After unscrewing the mounting bolt as loosely as possible and completely loosening the bolt, tilt the front door window glass (A) to pull out it upwards.
|
| 6. | To install, reverse the removal procedure.
|
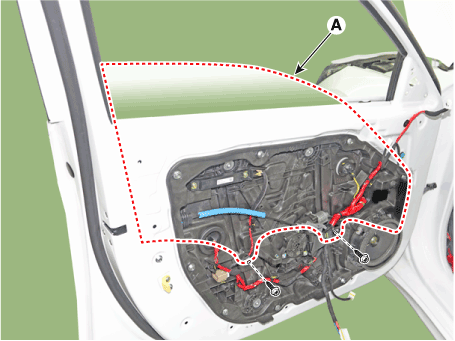
Front Door Module
Components and components location
| Component Location |
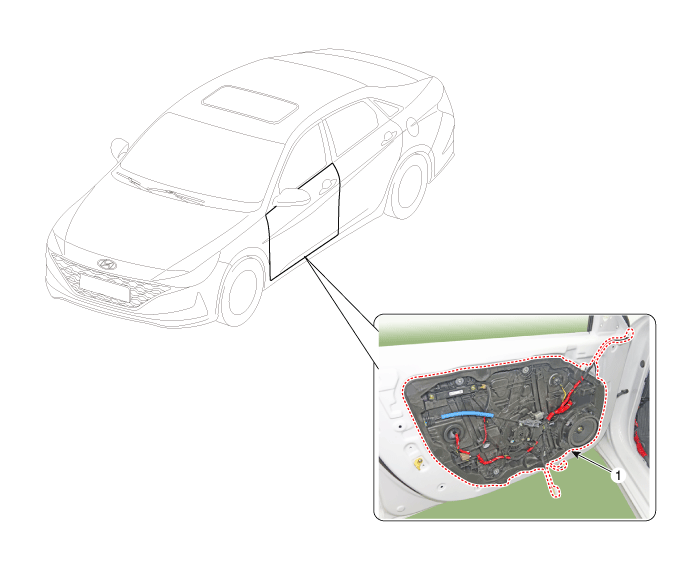
| 1. Front door module |
Repair procedures
| Replacement |
| 1. | Remove the front door window glass. (Refer to Front Door - "Front Door Window Glass") |
| 2. | Remove the front door outside handle. (Refer to Front Door - "Front Door Outside Handle") |
| 3. | Remove the outside handle pad (A).
|
| 4. | Loosen the front door outside handle base mounting bolt (A).
|

| 5. | Press the lock pin, separate the outside rear view mirror connector (A).
|
| 6. | Press the lock pin, sepatate the front door main connector (A).
|
| 7. | Loosen the front door latch mounting screws and bolts.
|
| 8. | Loosen the mounting bolts and remove the front door module (A).
|
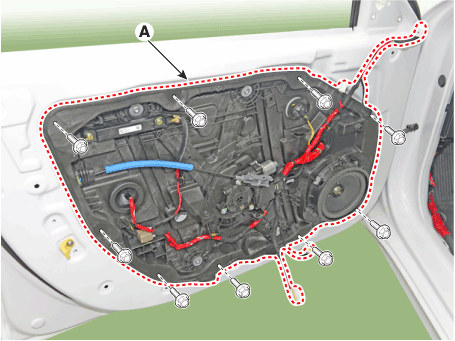
| 9. | To install, reverse the removal procedure.
|
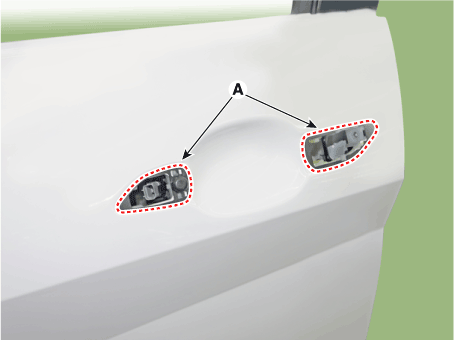
Front Door Outside Handle
Components and components location
| Component Location |
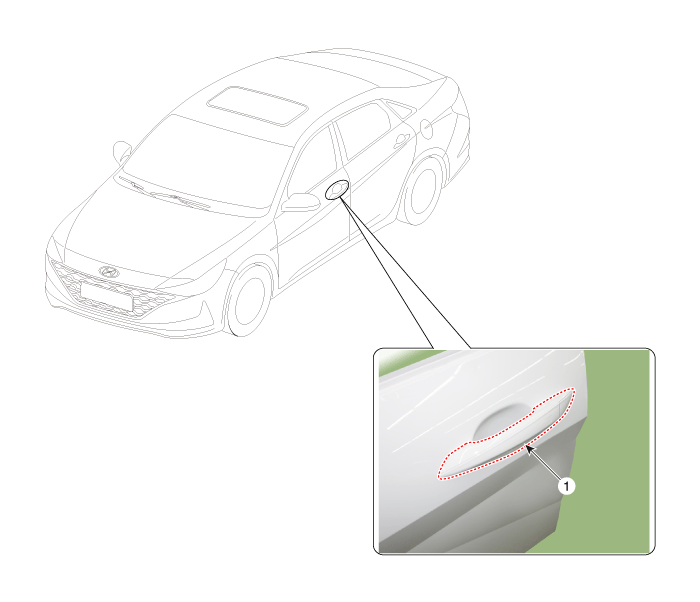
| 1. Front door outside handle |
Repair procedures
| Replacement |
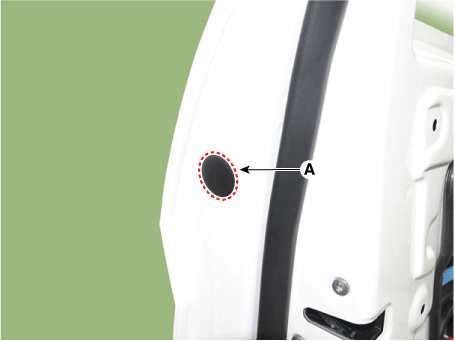
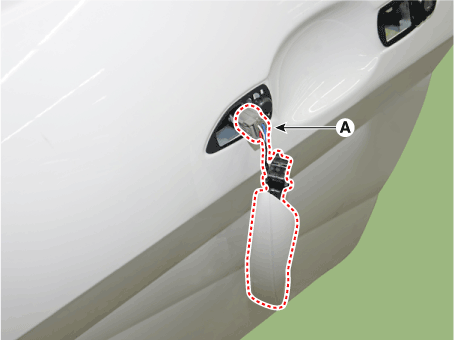
| 1. | Remove the plug hole (A).
|
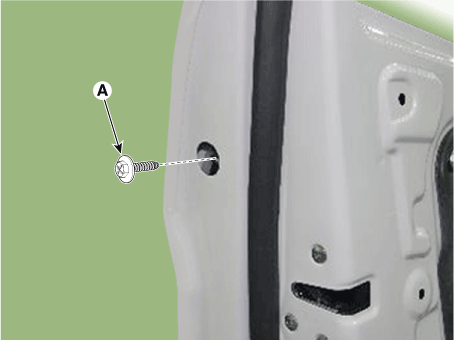
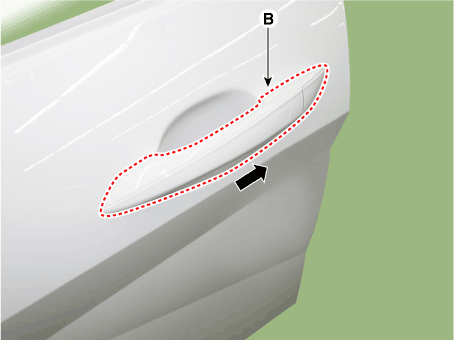
| 2. | Loosen the mounting screw (A) and then remove the front door outside handle (B) by sliding it forward.
|
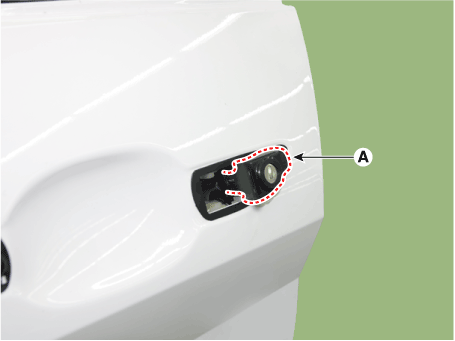
| 3. | Remove the front door lock assembly (A).
|
| 4. | Disconnect the front door outside handle connector (A).
|
| 5. | To install, reverse the removal procedure.
|
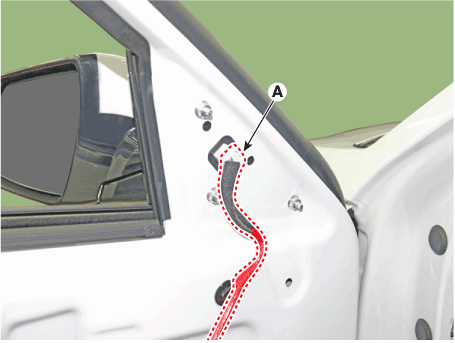
Front Door Belt Outside Weatherstrip
Repair procedures
| Replacement |
| 1. | Remove the outside rear view mirror. (Refer to Mirror - "Outside Rear View Mirror") |
| 2. | Pull down the front door window glass to the lowest level by pressing the power window glass switch. |
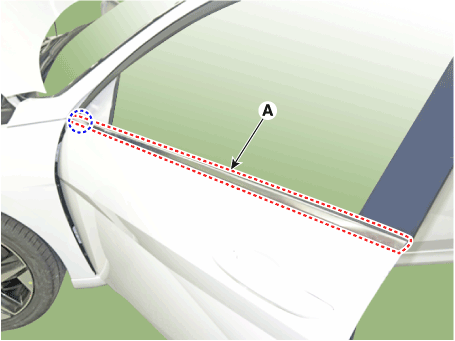
| 3. | After loosening the mounting screws, remove the front door belt outside weatherstrip (A).
|
| 4. | To install, reverse the removal procedure. |
|
Front Door Belt Inside Weatherstrip
Repair procedures
| Replacement |
| 1. | Remove the front door trim. (Refer to Front Door - "Front Door Trim") |
| 2. | Remove the front door belt inside weatherstrip (A).
|
| 3. | To install, reverse the removal procedure.
|

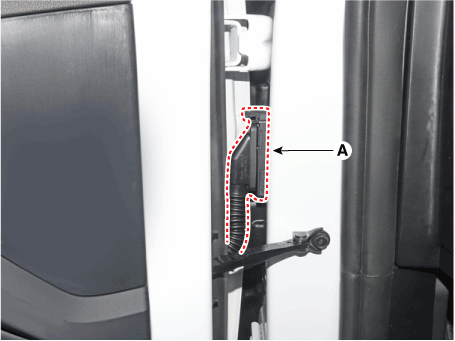
Front Door Side Weatherstrip
Repair procedures
| Replacement |
| [Front door side weatherstrip] |
| 1. | Loosen the front door checker (B) mounting bolt.
|
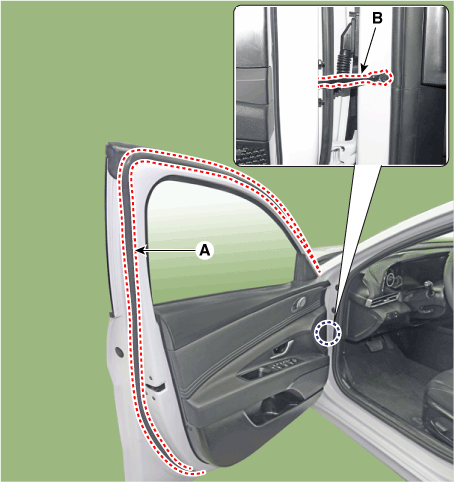
| 2. | Detach the clips, then remove the front door side weatherstrip (A).
|
| 3. | To install, reverse the removal procedure. |
|
| [Front door body side weatherstrip] |
| 1. | Detach the clips, then remove the front door body side weatherstrip (A). [LH]
[RH]
|
| 2. | To install, reverse the removal procedure.
|
Front Door Latch
Components and components location
| Component Location |
| 1. Front door latch |
Repair procedures
| Replacement |
| 1. | Remove the front door module. (Refer to Front Door - "Front Door Module") |
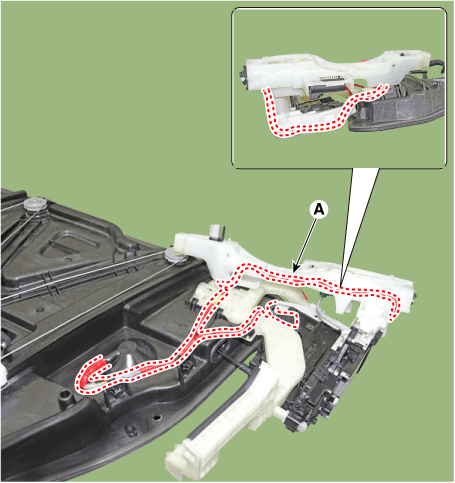
| 2. | Remove the front door inside handle cage (A) by pulling it in the direction of the arrow.
|
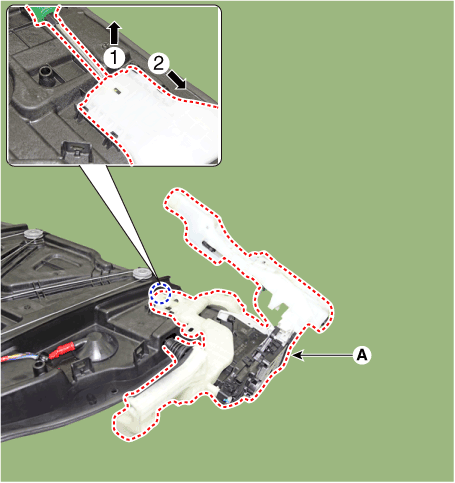
| 3. | Separate the front door outside handle base connector (A).
|
| 4. | Separate the front door outside handle connector wiring harness (A).
|
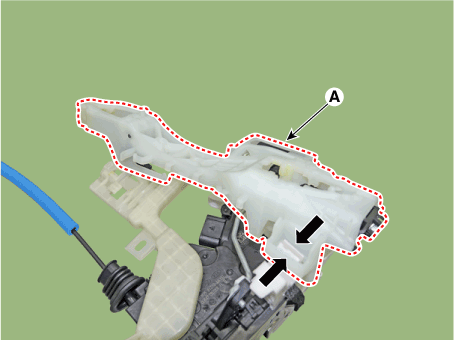
| 5. | Remove the front door latch assembly (A) by pulling it in the direction of the arrow.
|
| 6. | Remove the front door outside handle base (A) by pushing in the lock pins located in the back.
|
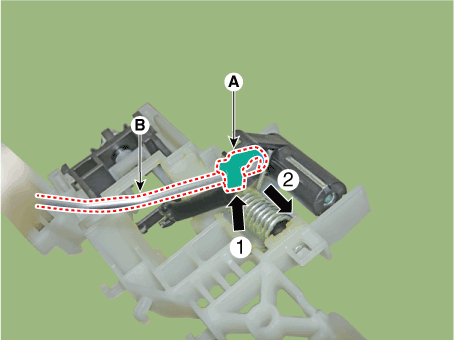
| 7. | Slide the locking pin (A) in the direction of the arrow to release the lock and then remove the rod (B).
|

| 8. | To install, reverse the removal procedure.
|


