 Hyundai Elantra CN7: Engine And Transaxle Assembly
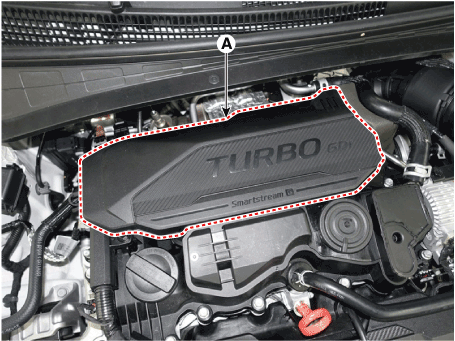
Engine Cover
Repair procedures
| Removal and Installation |
| 1. | Remove the engine cover (A).
|
| 2. | Installation is reverse order of removal |
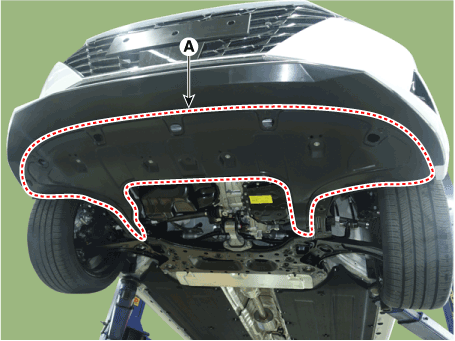
Engine Room Under Cover
Repair procedures
| Removal and Installation |
| 1. | Remove the engine room under cover (A).
|
| 2. | Installation is reverse order of removal. |
Engine Mounting
Components and components location
| Components |
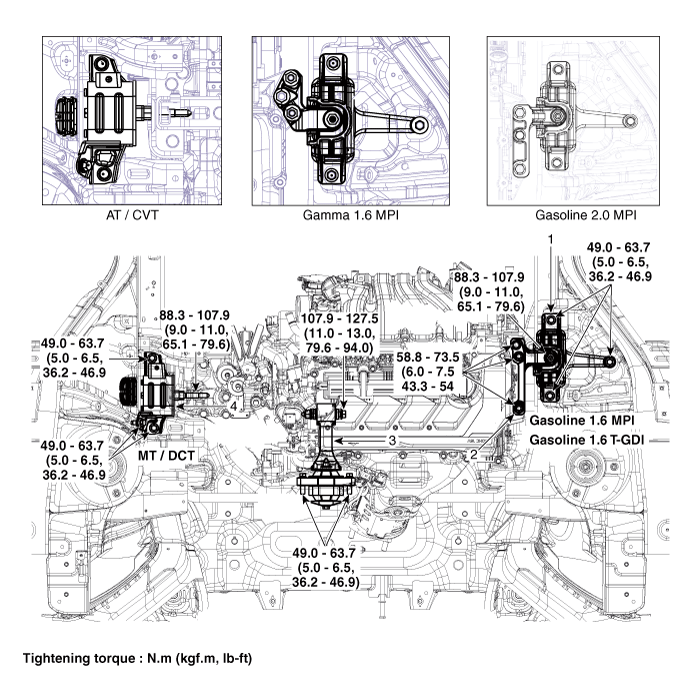
| 1. Engine mounting bracket 2. Engine mounting support bracket | 3. Roll road braket 4. Transaxle mounting bracket |
Repair procedures
| Removal and Installation |
Engine mounting bracket
| 1. | Remove the engine room under cover. (Refer to Engine and Transaxle Assembly - "Engine Room Under Cover") |
| 2. | Install the jack to the edge of oil pan.
|

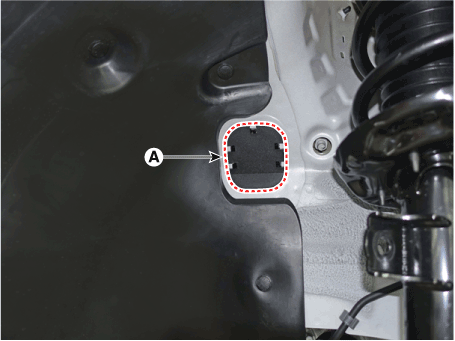
| 3. | Remove the engine mounting support bracket (A).
|
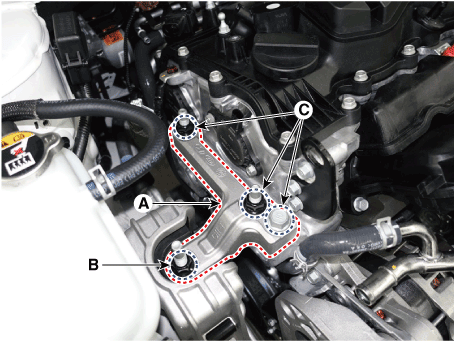
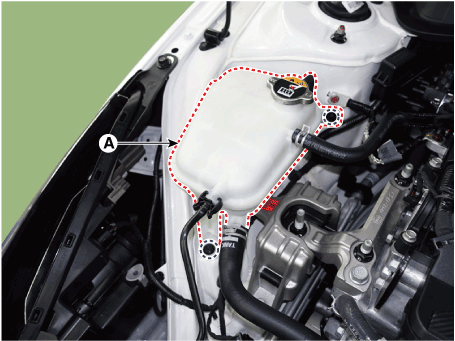
| 4. | Loosen the coolant reservoir tank (A) mounting bolts to obtain engine mounting working space.
|
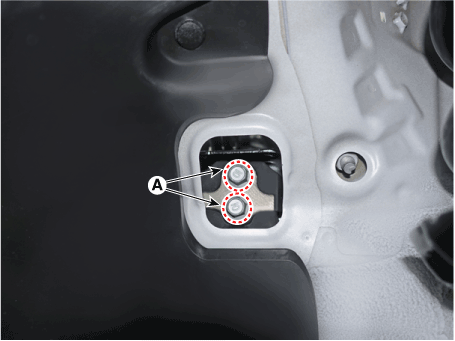
| 5. | Remove the engine mounting bracket (A).
|
| 6. | Installation is in the reverse order of removal. |
Transaxle mounting bracket
| 1. | Disconnect the negative battery terminal. |
| 2. | Remove the engine room under cover. (Refer to Engine and Transaxle Assembly - "Engine Room Under Cover") |
| 3. | Remove the air duct and air cleaner assembly. (Refer to Intake and Exhaust System - "Air Cleaner") |
| 4. | Remove the battery and battery tray. (Refer to Engine Electrical System - "Battery") |
| 5. | Place the jack under the transaxle.
|
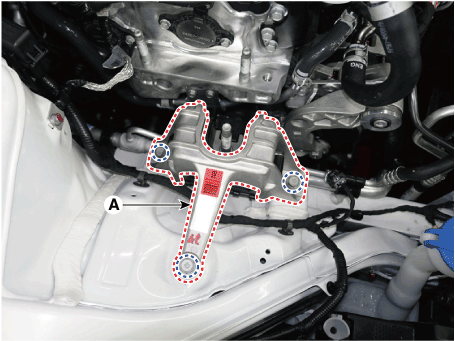
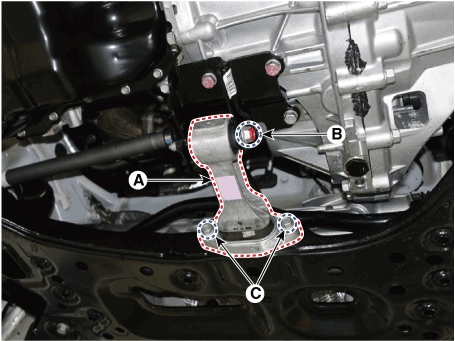
| 6. | Remove the service cover (A).
|
| 7. | Loosen the transaxle support bracket mounting bolts (A).
|
| 8. | Remove the transaxle mounting bracket (A).
|
| 9. | Installation is in the reverse order of removal. |
Roll rod bracket
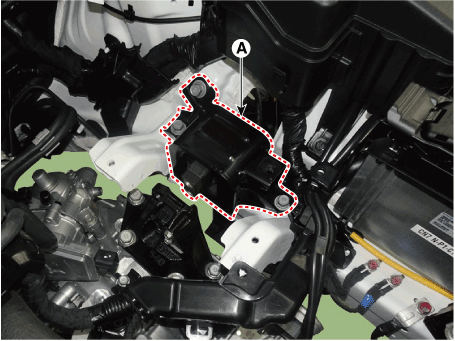
| 1. | Remove the roll rod bracket (A).
|
| 2. | Remove the roll rod support bracket (A).
|
| 3. | Installation is in the reverse order of removal. |
Engine And Transaxle Assembly
Repair procedures
| Removal |
|
|

| 1. | Disconnect the negative battery terminal. |
| 2. | Remove the engine cover. (Refer to Engine and Transaxle Assembly - "Engine Cover") |
| 3. | Remove the engine room under cover. (Refer to Engine and Transaxle Assembly - "Engine Room Under Cover") |
| 4. | Drain the coolant. (Refer to Cooling System - "Coolant") |
| 5. | Recover the A/C refrigerant and then remove the high & low pressure pipes of A/C compressor. (Refer to Heating, Ventilation Air conditioning - "Compressor") |
| 6. | Remove the air duct and air cleaner assembly. (Refer to Intake and Exhaust System - "Air Cleaner") |
| 7. | Remove the battery and battery tray. (Refer to Engine Electrical System - "Battery") |
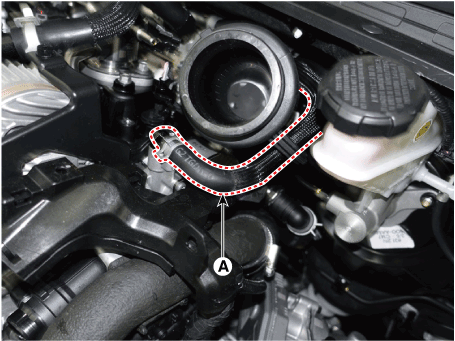
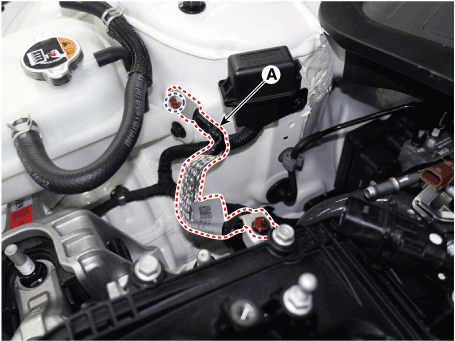
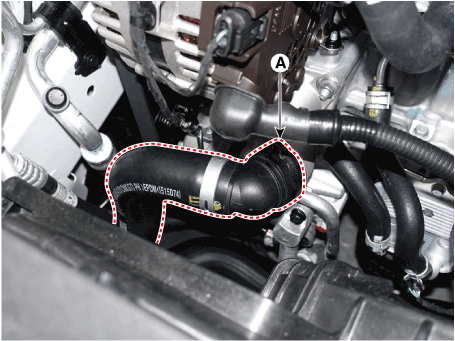
| 8. | Disconnect the brake booster vacuum hose (A).
|
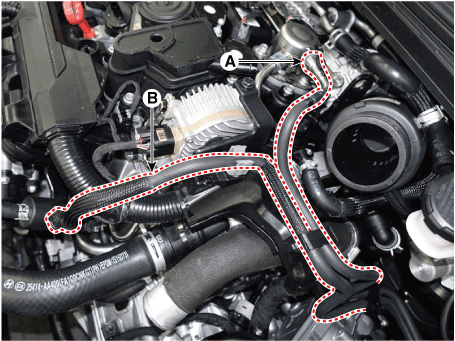
| 9. | Disconnect the fuel hose (A) and PCSV hose (B).
|
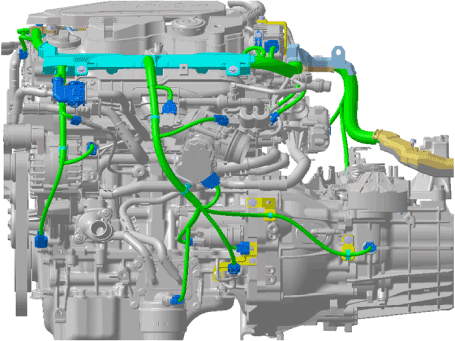
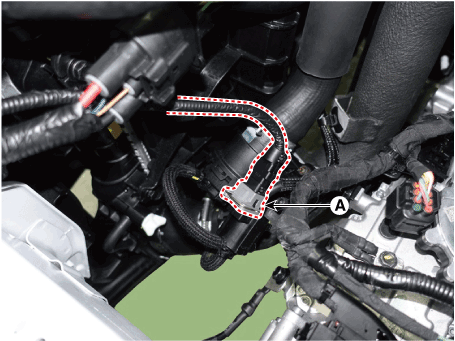
| 10. | Disconnect the wiring connectors and harness clamps and remove the connector brackets around the engine and transaxle assembly.
|
| 11. | Disconnect the engine ground cable (A).
|
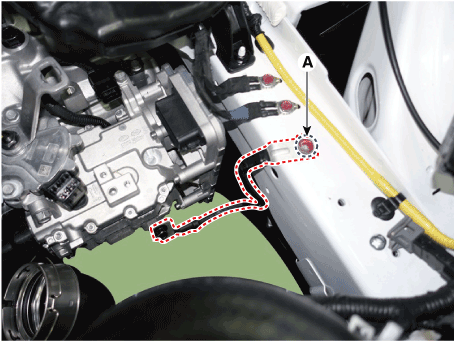
| 12. | Disconnect the transaxle ground cable (A).
|
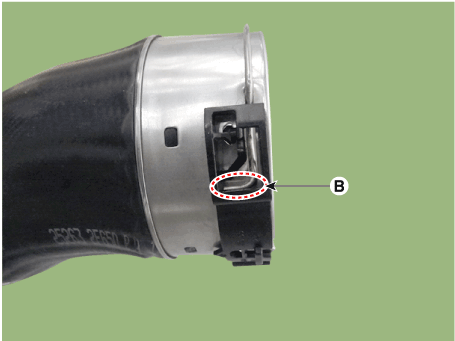
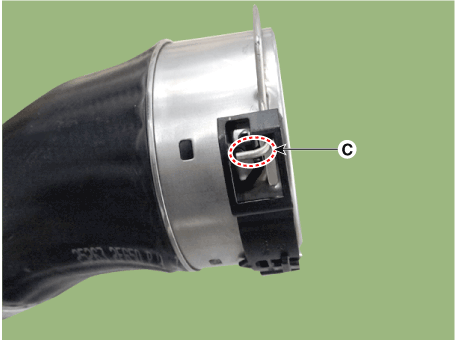
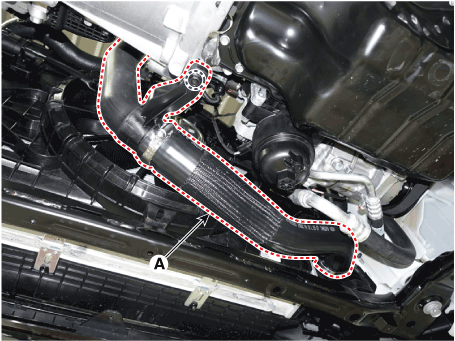
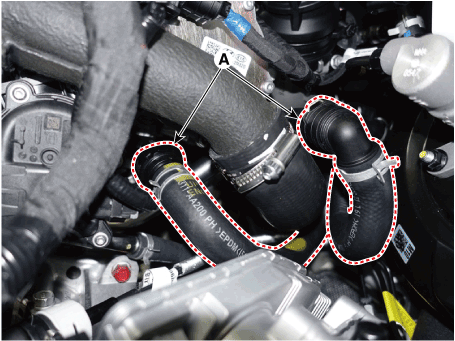
| 13. | Remove the intercooler inlet hose and pipe.
|
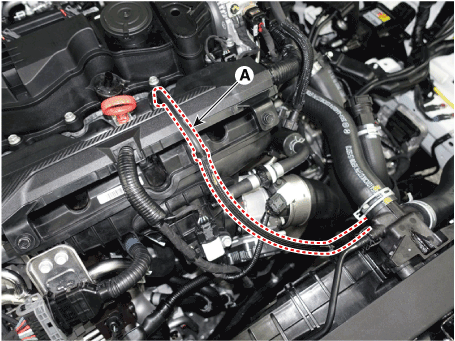
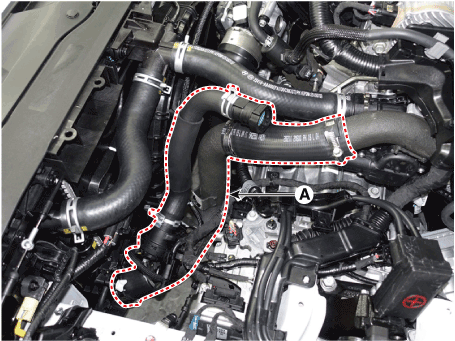
| 14. | Remove the intercooler outlet hose and pipe.
|
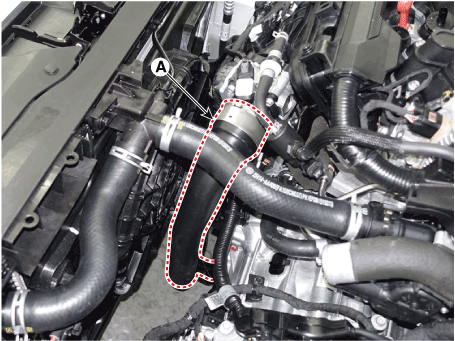
| 15. | Disconnct the radiator upper hose (A).
|

| 16. | Disconnct the radiator lower hose (A).
|
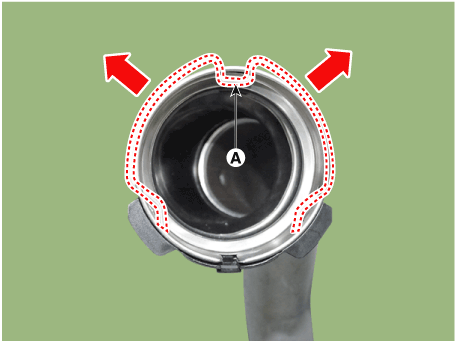
| 17. | Disconnect the coolant reservoir tank water hoses (A).
|
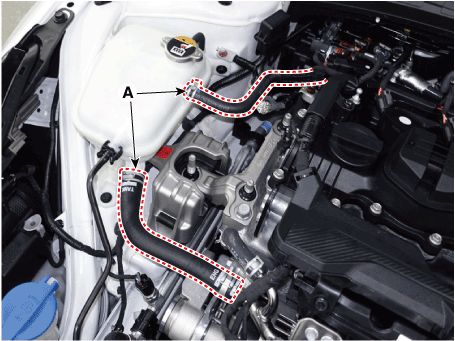
| 18. | Disconnect the heater hoses (A).
|
| 19. | Remove the universal joint from the shaft joint (Refer to Steering System - "Steering column & shaft") |
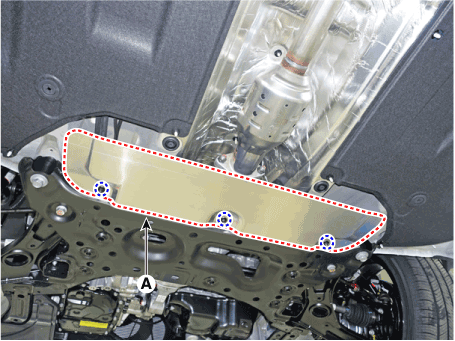
| 20. | Remove the front muffler heat protector (A).
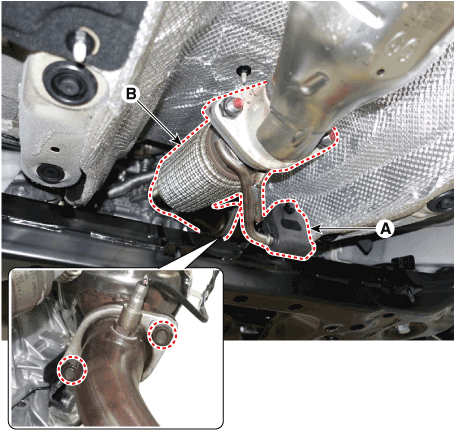
|
| 21. | Loosen the hanger (A) and then remove the front muffler (B).
|
| 22. | Remove the roll rod bracket (A).
|
| 23. | Remove the roll rod mounting support bracket (A).
|
| 24. | Remove the sub frame. (Refer to Suspension System - "Sub frame") |
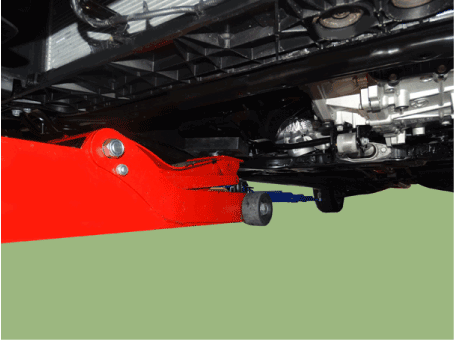
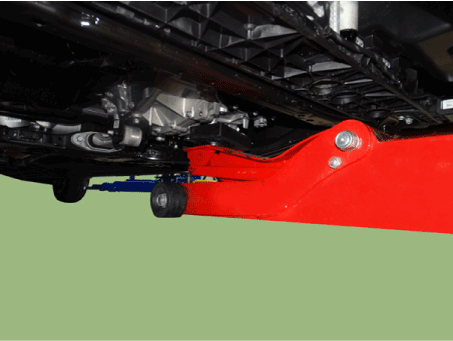
| 25. | Support the engine and transaxle assembly safely with a floor jack.
|
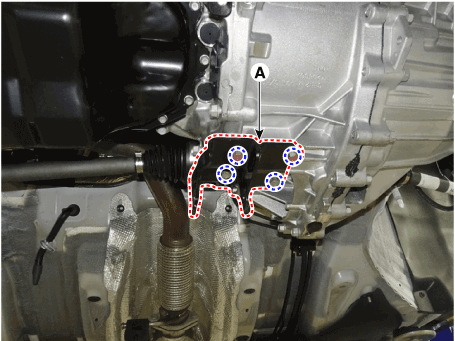
| 26. | Remove the engine mounting support bracket (A).
|
| 27. | Remove the service cover (A).
|
| 28. | Remove the transaxle mounting bolts (A).
|
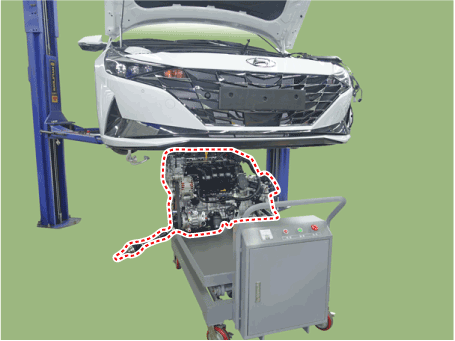
| 29. | Remove the engine and transaxle assembly from a vehicle by slowly lifting off the vehicle.
|
| 30. | Install in the reverse order of removal.
|


